3D Printing Bobbins/Formers for Coils

  • Topic Is Sticky
  • 2.2K Views
  • Last Post 03 October 2022
Chris posted this 27 October 2020

My Friends,

An Experiment today, I hope it works out!

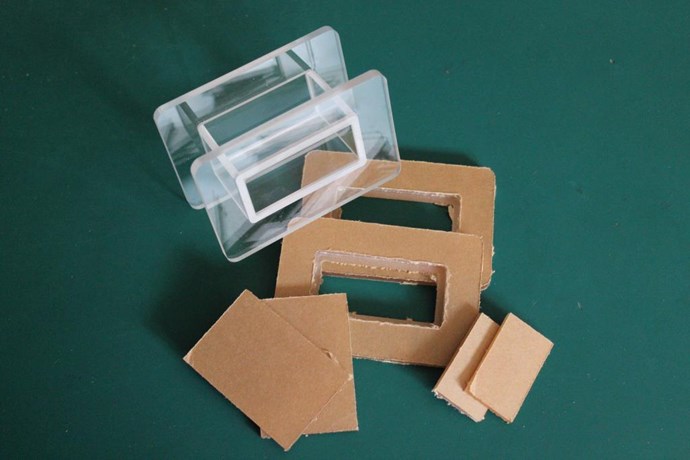
Coil Formers or Coil Bobbins are one of the hardest things to come by! In the past I have made them from CNC Cut Plexi Glass, or Acrylic Plastic:

Ref: CNC Machine

This process is expensive and wasteful!

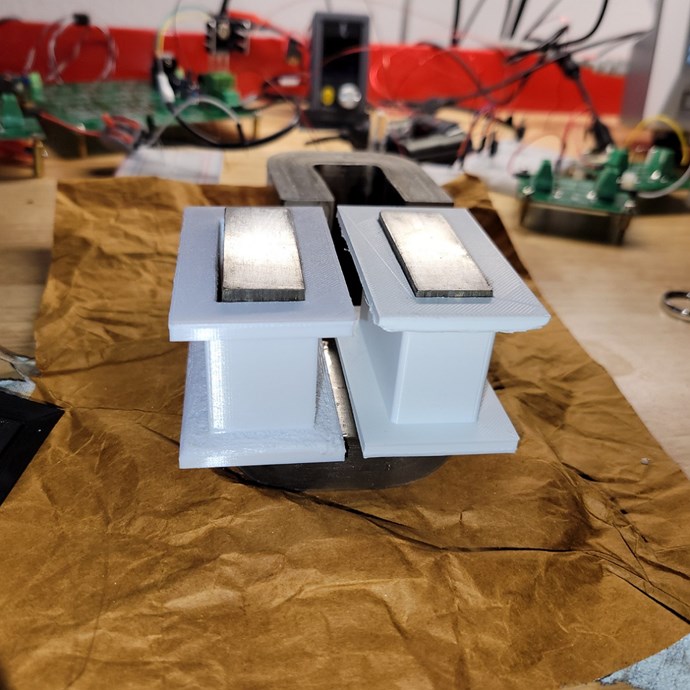
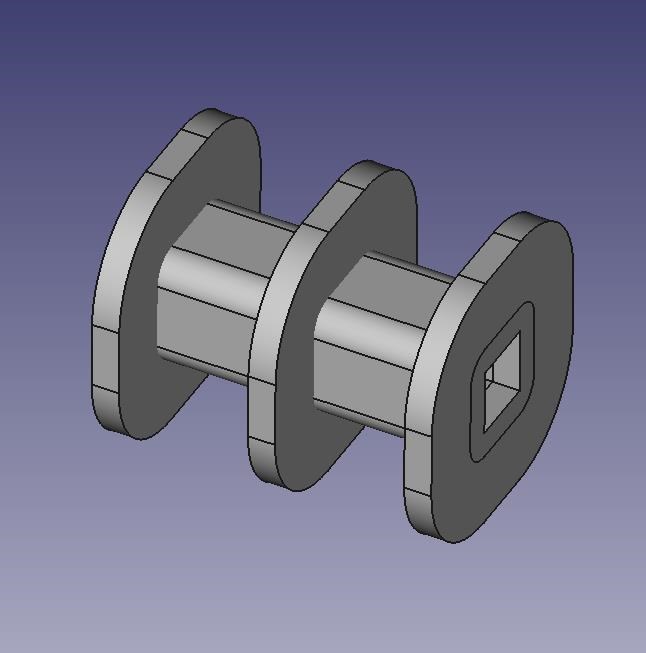
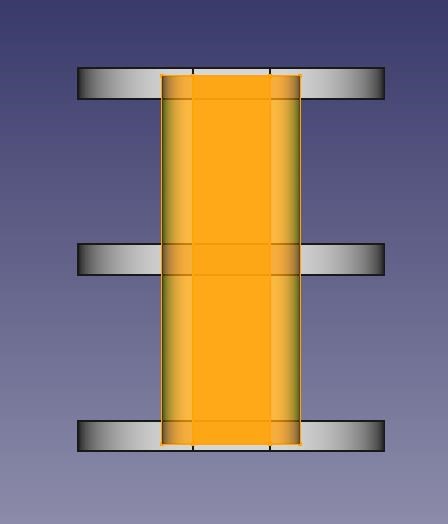
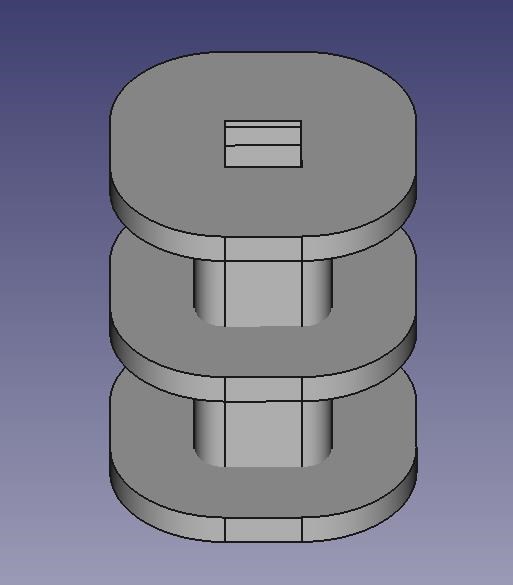
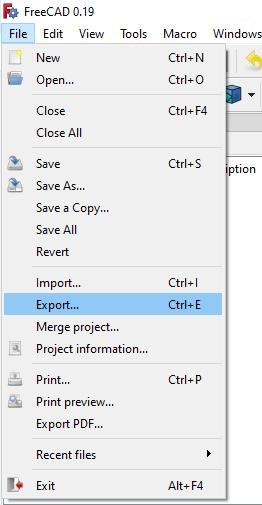
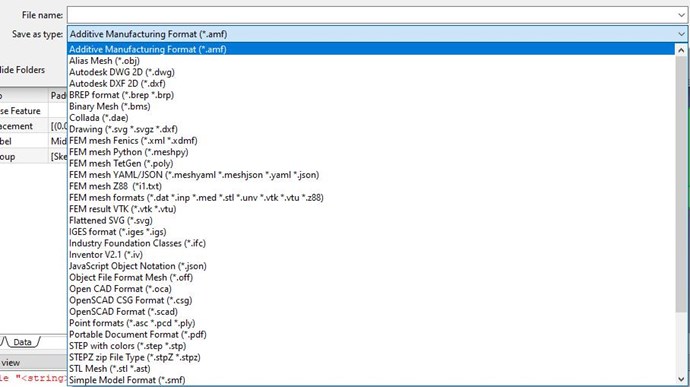
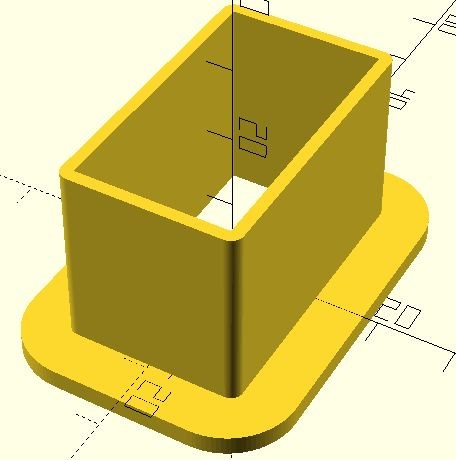
I have designed a Coil Former/Bobbin in FreeCAD and have basic dimensions set:


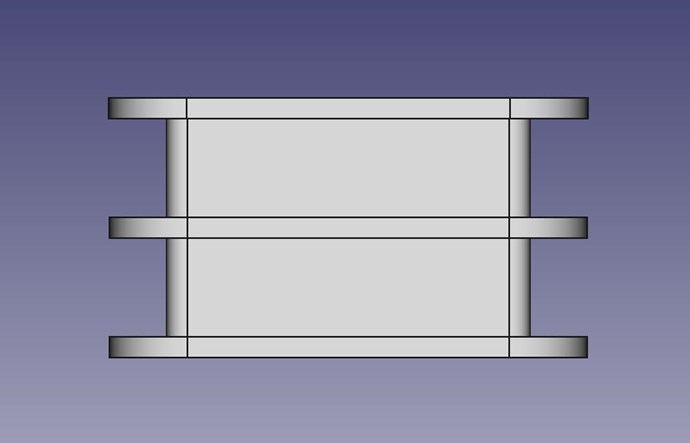
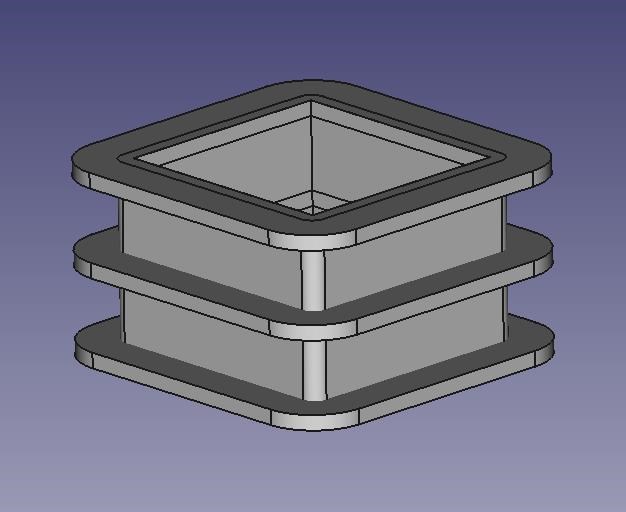
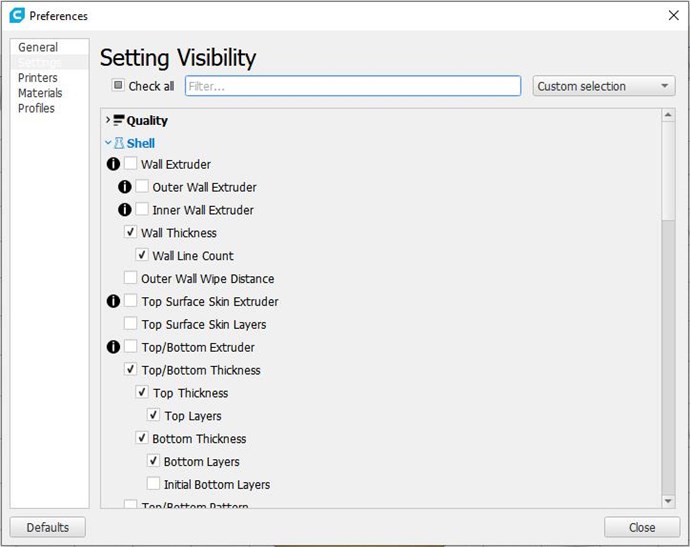
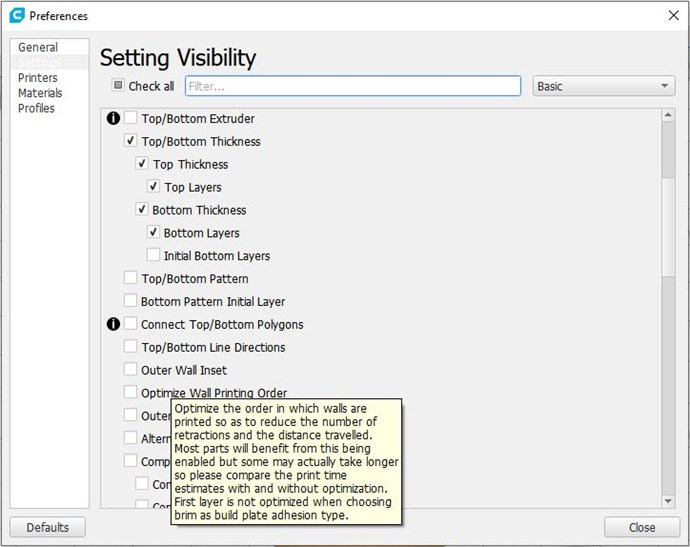
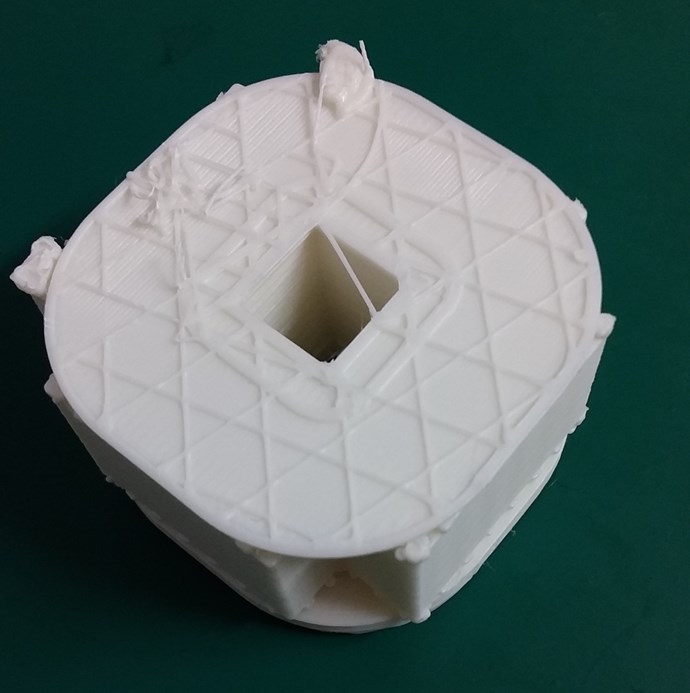
I am new at this, so I believe I may need Supports to help this turn out ok. With all experiments, the process will be perfected over time.

What I use:

  1. FreeCAD - Free CAD Design Software with hundreds of Videos on YouTube.
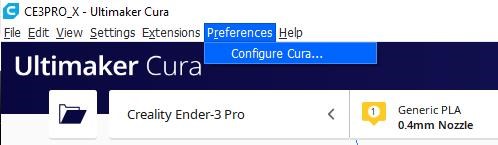
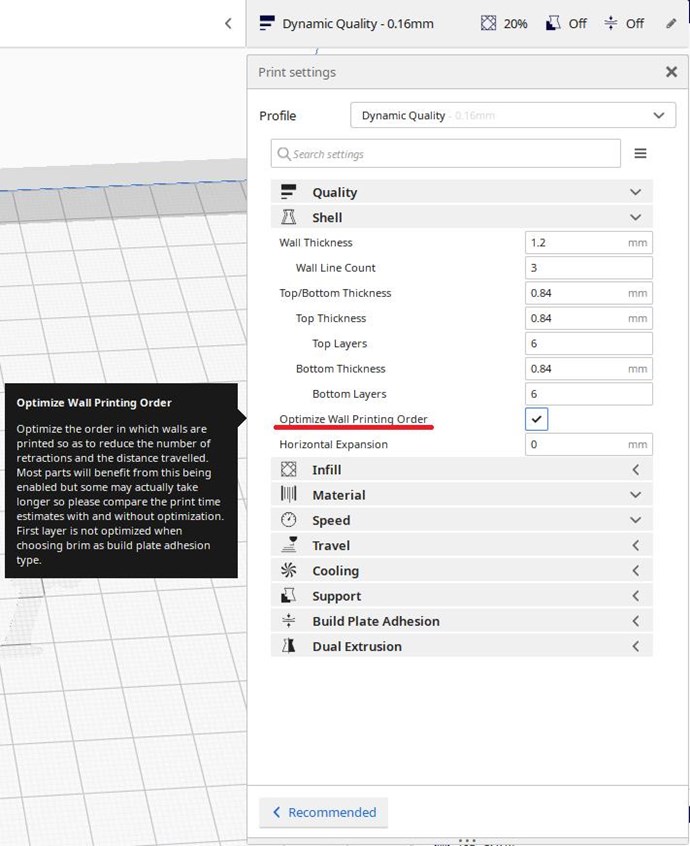
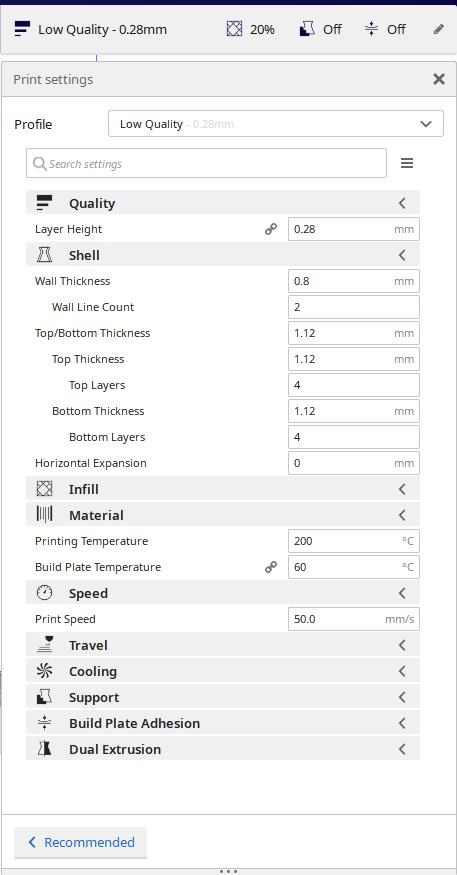
  2. Ultimaker Cura - Free also excellent for 3D Printing, does all the Splicing and so on.
  3. Ender 3 Pro an excellent and very cheap 3D Printer, I paid $260 for mine.


Very easy to put together!

Supports seem fairly easy, here is a good video:


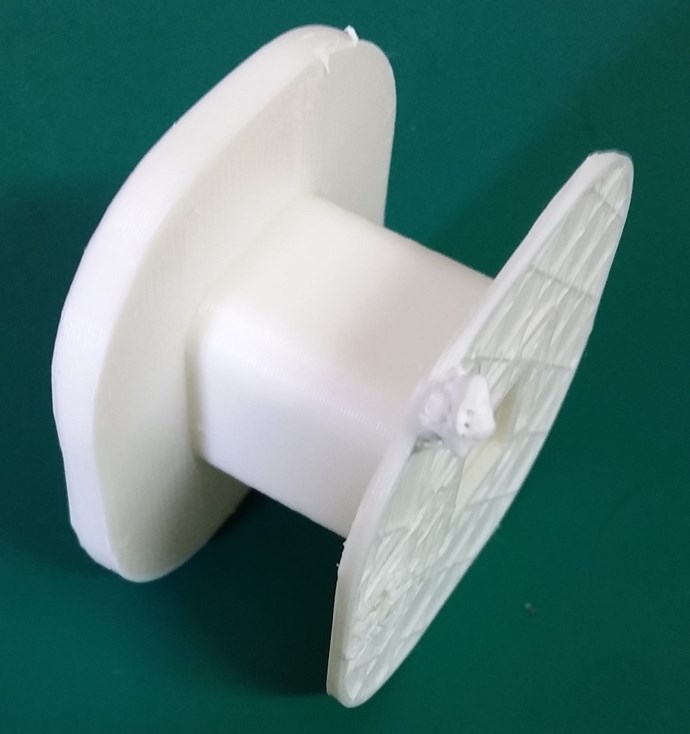
I will update you asap with the result!

Best wishes,

   Chris

Order By: Standard | Newest | Votes
ansen posted this 03 October 2022

Printing bobbins is one of the main reasons I bought my 3D printer for. I have the Anycubic Vyper, and I'm really happy with it.

  • Liked by
  • Chris
  • Augenblick
Chris posted this 15 May 2022

Hey Editor,

Very Impressive Work! Thank You for Sharing!

Best Wishes,

   Chris

  • Liked by
  • Jagau
  • Augenblick
editor posted this 15 May 2022

Hi,


and here is my version of the coil former. It is very narrow, one part printed 2x and then glue together. No support nothing special. Printed with PLA.

I'm attaching the fusion file and the stl file.


br

Attached Files

AlteredUnity posted this 14 May 2022

Just got my Creality Ender3, it does pretty great prints for such a low rating on pcmag.com(tho that's prob more for professional prints. These are for AMCC-0200 core, made in freecad, which makes it easy to change dimensions etc. The first print(left), like Wistiti, was left with plenty of room- spaced 1mm extra from core, wall thickness 3mm, so did a second print, with rounded edges outside of body, body, made walls 2mm thick - tho prob too thin and bit warped because one side pinched the core a bit more than the other,  tho still fits great, spaced- .5 mm from core. This was printed without any supports so I had to sand down lil pieces from the bottom of the top layer. Overall very satisfied, with results. I will post the .stl file and/or gcode in a bit.

lfarrand posted this 01 May 2022

Hi folks. I had trouble sourcing reasonably priced bobbins for my AMCC200 Metglas core so I decided to create a 3D model using FreeCAD, which I then exported STL files for so that I could slice them to G-code and print on my 3D printer.

You will need to print:

  • 1x Metglas AMCC200 bobbin-Top.stl
  • 1x Metglas AMCC200 bobbin-Bottom.stl
  • 2x Metglas AMCC200 bobbin-End.stl
  • 2x Metglas AMCC200 bobbin-Side.stl

Once the parts are printed they can be assembled together, preferably with superglue. You might need to sand / trim some edges if they are not completely flat.

Once the bobbin is on the core then the two sections can be pressed together flush. There is no gap.

I've attached the FreeCAD drawing along with the STL files in a zip file. I had to rename it from .zip to .pdf in order to upload it here, so you will need to do the reverse after downloading. I hope someone finds this useful!

IMG_1257

IMG_1258

editor posted this 20 April 2022

Thanks Chis for the info.

I know there are a lot of tools to draw 3d object. I was asking if somebody already build one, so I don't have to do it again. I prefer Fusion360.


have a nice day or night, e

  • Liked by
  • Augenblick
  • Chris
Chris posted this 19 April 2022

Hey Editor,

Free Cad is free and easy to learn. Plenty of Tutorial Videos on YouTube.

Best Wishes,

   Chris

  • Liked by
  • Augenblick
editor posted this 19 April 2022

Hi,
If some of you need a custom drawing CAD for making a bobine I can help I'm a drawer and I have autocad.

I also have SW.


HI,

maybe you have some 3d  model for the coil bobine for the Amcc320 core?

regards, e


  • Liked by
  • Chris
  • Augenblick
AETHERIC_MIND posted this 06 January 2022

Hi,
If some of you need a custom drawing CAD for making a bobine I can help I'm a drawer and I have autocad.

I also have SW.


''Change is never easy but it's worth inertia''

Heliarc posted this 06 January 2022

Oh never knew this thread existed here!! I 3D print all my own spools as well. Use PETG on a fairly modified ender 3.

What I do, is print one side with the bottom of the spool, with center, and put a groove seat on top and match the top of the bobbin plate so that it seats into the top!! Makes printing without supports wayyy easier. And I just use cheap runny superglue with great success!

Just wanted to throw my 2c out. I have tested the strength to failure on both glued and printed side of the edges (2mm) and even glued side will break around the glue. And not seperate.

Printing bobbins is almost a must if you plan making a ton of coils!!

Wistiti posted this 12 January 2021

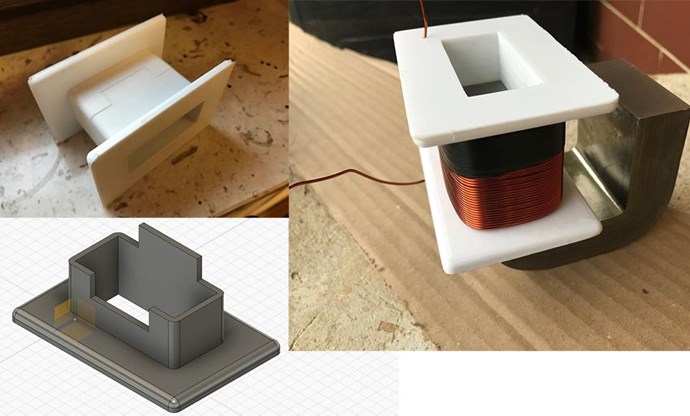
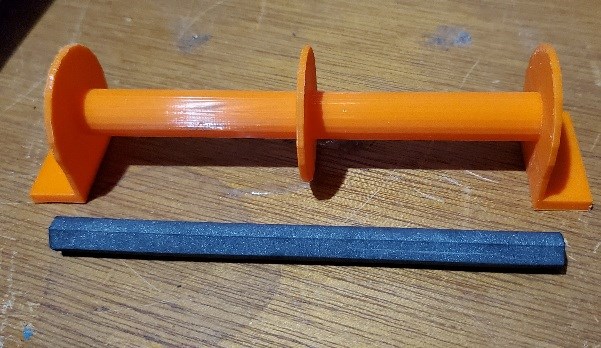
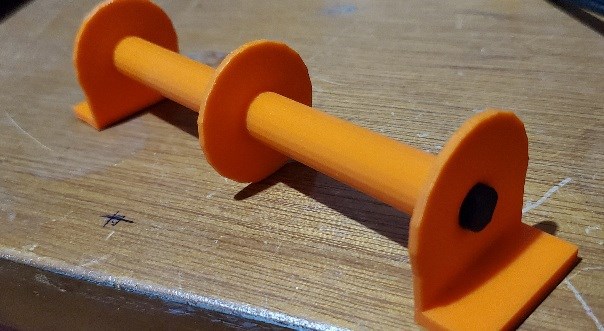
One other former for a ferrite rod.

Wistiti posted this 12 January 2021

Hi Drago. To be honest I don't know 🤷‍♂️ It was my first conception and I have leave 2mm between the core and the former to be sure it fit and now I have to admit i can give only 0.5mm and I will be ok. This printer really surprised me.

For the question about the effect of coupling, only the experiment will tell! 😉

drago posted this 12 January 2021

Hello guys.
How is it going?
Great Wistiti...That is looking great mate.Good job.
About the bobins,I have 1 question ....and that is:
How tight must the bobins be?..I have my original bobins for the AMCC core,and they are 1-2 mm too big inside. (Not 100% tight )
Does this affect the coupling with the core?
Much Love.
@drago

Wistiti posted this 12 January 2021

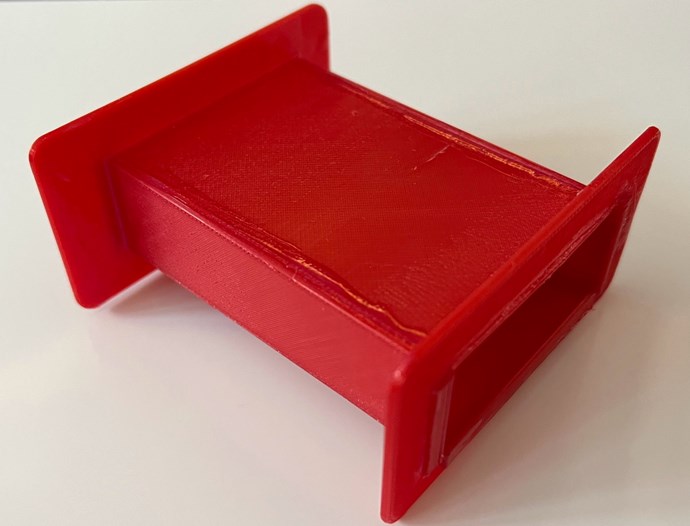
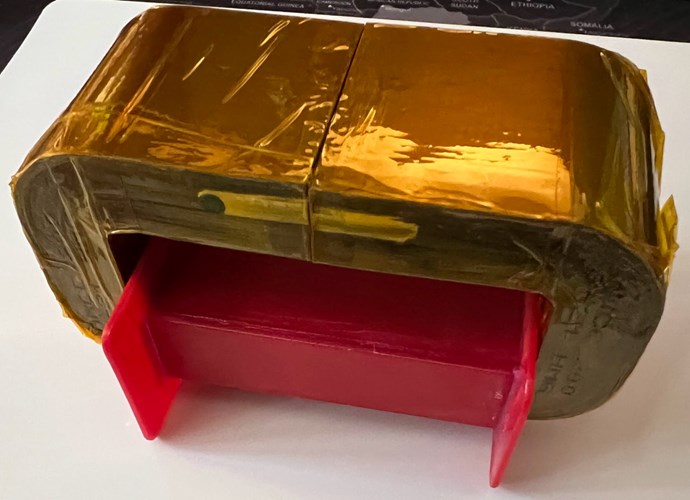
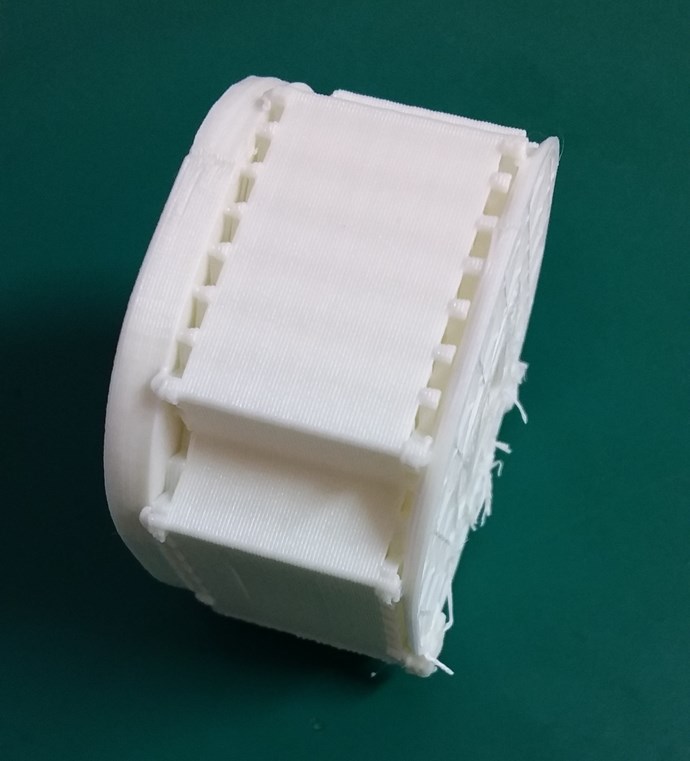
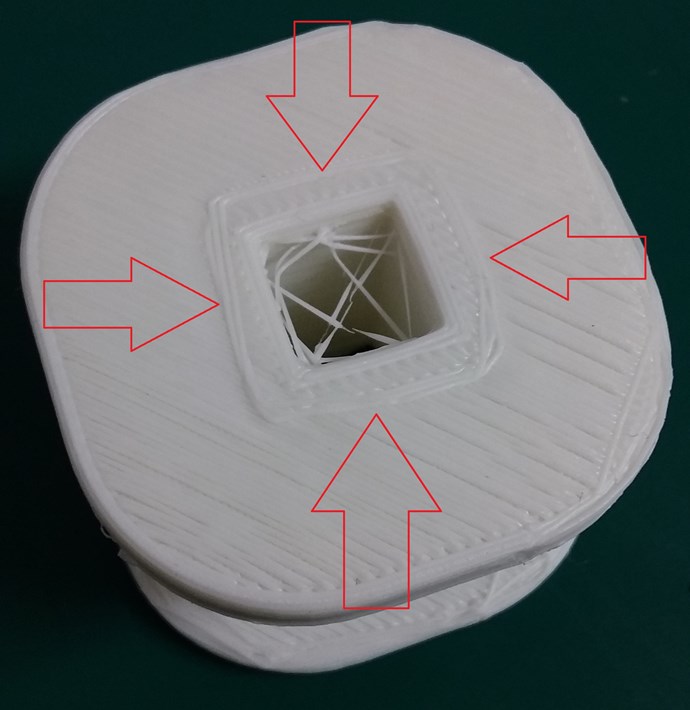
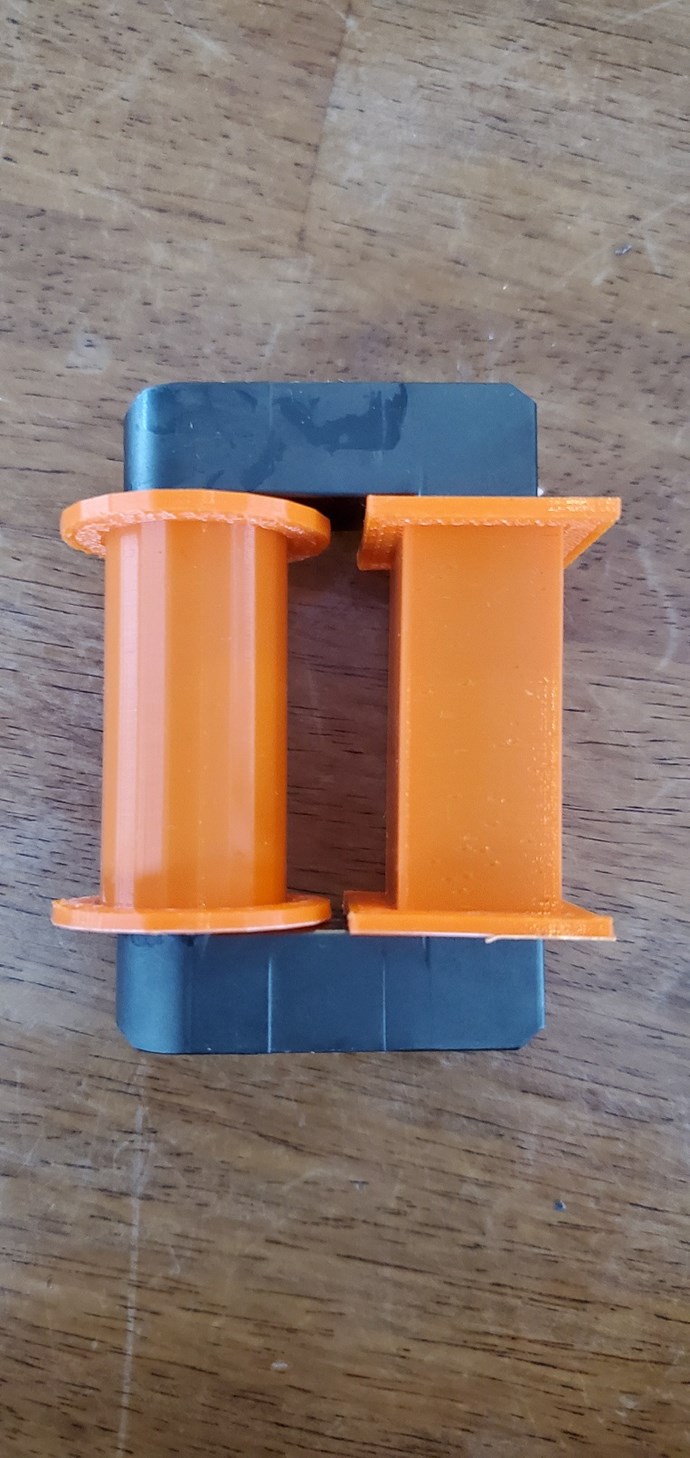
Hi builders! Yesterday I have created my first coil former using thinkercad (free and really easy). Slicing it with Cura and printing it with my Creality Ender3. Really 3D printer are a part of our future!

Zanzal posted this 01 January 2021

I was just about to print up some more bobbins for another go at one of the experiments here and I noticed Chris made this thread. 3D Printed bobbins are what I use. Although one can make them on an FDM 3D printer, I prefer to use a LCD resin printer. They are pretty cheap now, and can be had for a few hundred dollars.. I don't like using an FDM printer because the rough surface, but the mechanical properties of FDM filaments are generally superior to UV resins.

The secret to using resin printers to make bobbins is to use a non-brittle resin as a base like Siraya Tech's Fast or Blue and then mix in Siraya Tech's Tenacious resin (I use 25-30% Tenacious by volume). There are probably some other brands of good tough resins that make great bobbins, but after finding Siraya's Tenacious resin I stopped looking. Tenacious can also be used as a bonding agent to glue the bobbins together. I print them in halves and then clamp them together with a little Tenacious resin and cure them in a UV light box.


thaelin posted this 07 December 2020

Ender 3 by Creality is a great little printer. Hear a lot of great praise for it.  At $200 kit, cant beat it. If you cant go there, I do have a CRS10 and am on the west coast. Be glad to help forward your journey. Pay the shipping and a bit towards the fillament, I'm glad to help. Let me know if you are interested. Any way you plot it $12 each is BS.

thay

  • Liked by
  • Chris
  • Augenblick
Kritischer posted this 07 December 2020

Hi everyone I hope you're well and that you're knocking down those barriers. Now that my core has arrived I'm starting to look at bobbin/coilform sources and damn they are hard to find. Sure I could glue some crap together but I'd like to not have crap.

I do need to get much more competent with modeling software and additive manufacturing but every single side project I have already is a complete specialization in itself. I was able to hack a bobbin model together and I got a quote from one of those contract manufacturers (https://www.xometrycom/) where you can upload your stl file and get a quote to print. Even with the economy option I was a little surprised how much they would be ($12 each) since each was made of two pieces.

If someone here in the US is willing to work with me I'd rather like to see the cash remain in the community then go to some nameless faceless CM. I'd be willing to pay for the time in materials, or pay by sending other resources or materials that you like to have but don't enjoy buying. I hate to say it but I suck at building things.

  • Liked by
  • Chris
  • Augenblick
thaelin posted this 05 November 2020

A few days late and a dollar short but Ravi, thanks for that short snippet of program for Cad. I installed Scad and played with the program a bit and found I can make it work for my cores. Cant thank you enough for it. Getting a set of .stl files to print now. Will be winding them soon. Exciting times ahead. Can finally start to work with a core/coil set that is like what is shown.

These 12hr days tho do really get in the way of things so not sure how long I will be. Will be adding to the fray here as things happen.

again thanks.


H2opower posted this 29 October 2020

This is an area where I too am moving towards printing my own bobbins as the ones shown here have about a six month turnaround from the time I design them to the time I can hold them in my hands.

These are the inner and outer bobbins for the transformers I make for the voltage intensifier circuit and with such a long turn around time it hinders me from doing things quickly when changes are needed to be made to the design through testing and learning what works best and what does not. The cost of making these at the local machine shop is really high something like $1250 for the inner bobbin and $1400 for the outter bobbin. This cost is far higher than the machine I am getting ready to buy that will allow me to make these bobbin on my own with a drastic cut in turnaround time from design to actually holding the part in my hands.

For my designs I need something with a lot more detail and precision than these filament types of 3D printers are capable of so I will be going with the SLA/MSLA type 3D printers. 

I must have smooth edges as if you rub off the protective coating of the wires while winding the transformer up the transformer will fail at the voltage levels they are required to run at in the voltage intensifier circuit. Then afterword's I have to vacuum resin seal the transformers to get all of the air out and keep the wires from vibrating as those two potential problems will shorten the transformer's life if they are not sealed by a resin to prevent them from killing the transformer. Me vacuum sealing the transformer: 

Sure the cost is a little more but when you factor in the risk of chaffing the wire's protective coating and then having the transformer fail as a result then paying a little more for the bobbins seems small in comparison as once they are vacuum sealed they are throwaway items as you can't recover much of anything after that. With these transformers everything has to be as close to perfect as you can get them as there are no do overs once made as you have to make a new one. 

Chris posted this 29 October 2020

Hey Munny,

For my First Design, and Third print, I am more than happy! The Ender 3 Pro is way more than satisfactory for my needs, I am very happy with it! Especially for the price!

The printer can print superb quality, my first two prints, others design, were first class!


I am super surprised by the intricate detail!

I am more than happy with the printer, my learning curve is what I am not happy with yet, soon, I will be able to avoid silly problems like I saw with the Coil Former Experiment.

Experience counts with everything we do! We get better at what we do with experience!

Best wishes,

   Chris

  • Liked by
  • cd_sharp
  • Augenblick
Chris posted this 29 October 2020

My Friends,

Some extra help videos:


This option should be a no brainer:


In the newer version of Cura, you need to go into: 


Preferences:


Into Shell:


Down to:


Optimize Wall Printing Order:


Now you should have the option, in Cura, to tick and untick the option as you need to! Like this:


This could dramatically speed up Prints by minimising the travel of the Steppers during the job!


Lots of tips and tricks to make for better 3D Printing!

   Chris

raivope posted this 28 October 2020

Rav:

   How do you make it to an .stl file which is what my software needs?


thay


In OpenSCAD - just press STL button (F7). In this sequence F5 (run, fast), F6 (render), F7 (save STL)

  • Liked by
  • Chris
  • Augenblick
Chris posted this 28 October 2020

My Friends,

Almost 2hrs into the print, the job failed. I had a few problems.

You can see, I had a large build up of Plastic on one edge. This had knocked the job off the Bed which was not very well stuck down as it was. I have printed this 3D Print with Cura Default settings for Low Quality:


I think with some fiddling and some better monitoring, pausing the job to clean the end of the nozzle from gunk, should help! In saying this, I am very happy with the end result:


Also, what I have done is offset the Center Wall, by 1mm, so it is inside the Top and Bottom Plate:


Notice in above images, and again here on the right hand side, we had a visible Wall line on the Top Plate:


In the Bottom Plate, that was stuck to the Bed, this is the outline seen:


A complete job, with slightly better Quality, will be more than sufficient for a Coil Former! Plenty strong enough and plenty flexible enough to easily modify the size and characteristic for the purpose needed!

A successful experiment, even though we have a failed Print job.

Best wishes,

   Chris


Chris posted this 28 October 2020

My Friends,

I have shrunk down the Bobbin size down, and started to slice a Low Quality version of the Coil Bobbin/Former for testing.

Here is the model in Cura:


The stripy yellow/brown is the supports. I am running a test print now, 36grams of filament and 3 hrs and 34 minutes is the estimated time.

Here is the start:


Not real nice, few little issues there. I think the Bed is too Hot, some lift. I should have a result in the next few hours.

EDIT: A short video:


This is my first 3D Design and 3D Print, it is my 3rd 3D Print. I hope this is helpful for others!

Best wishes,

   Chris


P.S: Thaelin, I use File -> Export and export the file to a type that's supported. Currently I am using: *.amf file and its working well so far:


Wistiti posted this 28 October 2020

Nice tread! I also have the Ender3 (not pro) and love it.

As Thay said petg is more resistant than pla and less harmful vapor then abs...

Will be nice to share some .stl files.

I will look to free cad until now I have not create a piece, i have just replicate some from thingivers and other site.

thaelin posted this 27 October 2020

Rav:

   How do you make it to an .stl file which is what my software needs?


thay


raivope posted this 27 October 2020

Hi,

I used OpenSCAD to print out Coil Formers in two pieces. Then you do not need any supports. Put those together and use soldering-iron or glue to connect pieces.

OpenSCAD has a very interesting programming language

Simplified example code below, just paste into OpenSCAD and press F5/run.

Raivo

$fn = 100;

// core parameters AMCC-0125

xyz = [19.4 + .6, 35 + .7, 121/2]; // length, depth, height
coil_length = 24;
side_thickness = 2.5;
bottom_size_extra = 8;
sleeve_thickness = 1.6;


mainItem(coil_length);


module mainItem(h) {
  // bottom
  translate([0, 0, -side_thickness])
  to3D(side_thickness) {
    bottom2D();
  }

  // top
  toSleeve(thickness=sleeve_thickness, h = h) {
    do2D();
  }
}


module bottom2D() {
  difference() {
    fillet(r=9) {
      square([xyz[0]+bottom_size_extra*2, xyz[1]+bottom_size_extra*2], center=true);
    }
    do2D();
  }
}

module do2D() {
  square([xyz[0],xyz[1]], center=true);
}


/* powerful helper methods */
module to3D(h = 60) {
  linear_extrude(height = h, twist = 0) {
    children();
  }
}

module fillet(r) {
  offset(r = r) {
    offset(delta = -r) {
      children();
    }
  }
}

module toSleeve(thickness = 1.2, h = 60) {
  to3D(h) {
    difference() {
      offset(r = thickness) {
        children();
      }
      children();
    }
  }
}


Chris posted this 27 October 2020

Hey Thaelin,

I am very fond of FreeCAD, tons of really good Tutorial Videos:


I posted a Thread: FreeCAD CAD Design Software, to help.

Thanks, and yes, will be interesting to see the result. I am using PLA at the moment, its all I have for now but will look at options soon.

Best wishes,

   Chris

thaelin posted this 27 October 2020

They are great to play with. I have a CrS10 and a Imac running Cura. My problem is how to use Cad. It has been a stumbling block with me. I can do it on paper all day long. In cad, I get just about every error you can think of.   
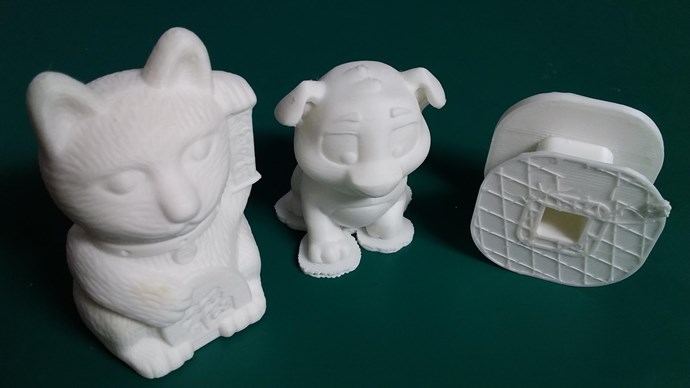
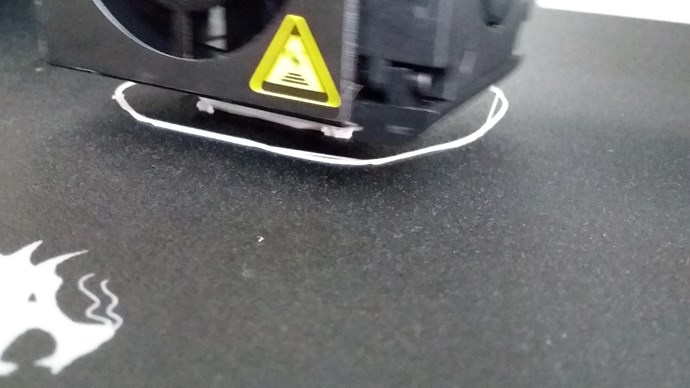
Getting ready to upgrade to PetG fillament as it is better and doesn't fall apart with moisture.

Look forward to your progress.

thay

We're Light Years Ahead!
Members Online:

No one online at the moment


What is a Scalar:

In physics, scalars are physical quantities that are unaffected by changes to a vector space basis. Scalars are often accompanied by units of measurement, as in "10 cm". Examples of scalar quantities are mass, distance, charge, volume, time, speed, and the magnitude of physical vectors in general.

You need to forget the Non-Sense that some spout with out knowing the actual Definition of the word Scalar! Some people talk absolute Bull Sh*t!

The pressure P in the formula P = pgh, pgh is a scalar that tells you the amount of this squashing force per unit area in a fluid.

A Scalar, having both direction and magnitude, can be anything! The Magnetic Field, a Charge moving, yet some Numb Nuts think it means Magic Science!

Message from God:

Hello my children. This is Yahweh, the one true Lord. You have found creation's secret. Now share it peacefully with the world.

Ref: Message from God written inside the Human Genome

God be in my head, and in my thinking.

God be in my eyes, and in my looking.

God be in my mouth, and in my speaking.

Oh, God be in my heart, and in my understanding.

Your Support:

More than anything else, your contributions to this forum are most important! We are trying to actively get all visitors involved, but we do only have a few main contributors, which are very much appreciated! If you would like to see more pages with more detailed experiments and answers, perhaps a contribution of another type maybe possible:

PayPal De-Platformed me!

They REFUSE to tell me why!

We now use Wise!

Donate
Use E-Mail: Chris at aboveunity.com

The content I am sharing is not only unique, but is changing the world as we know it! Please Support Us!

Thank You So Much!

Weeks High Earners:
The great Nikola Tesla:

Ere many generations pass, our machinery will be driven by a power obtainable at any point of the universe. This idea is not novel. Men have been led to it long ago by instinct or reason. It has been expressed in many ways, and in many places, in the history of old and new. We find it in the delightful myth of Antheus, who drives power from the earth; we find it among the subtle speculations of one of your splendid mathematicians, and in many hints and statements of thinkers of the present time. Throughout space there is energy. Is this energy static or kinetic? If static, our hopes are in vain; if kinetic - and this we know it is for certain - then it is a mere question of time when men will succeed in attaching their machinery to the very wheelwork of nature.

Experiments With Alternate Currents Of High Potential And High Frequency (February 1892).

Close