Akula Lantern 4 Replication

  • 576 Views
  • Last Post 10 January 2024
MTKE posted this 31 December 2023

Hello Everyone:

This is my first time to post on the form, and it's my great honor to be here. I too like everyone here want to see humanity able to have free energy for everyone, thus we can stop the pollution and global warming.

I want to share some of my experiment step by step, and the problem solving process, I will share as much and as details, thus the newcomer to this technology like me, will learn from my experiences and mistakes, and make sure their study and replication process a lot easier. I have not make it working yet, many problem need to discuss and solve, thus I will keep update.

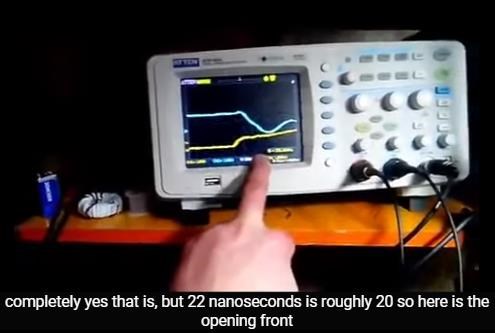
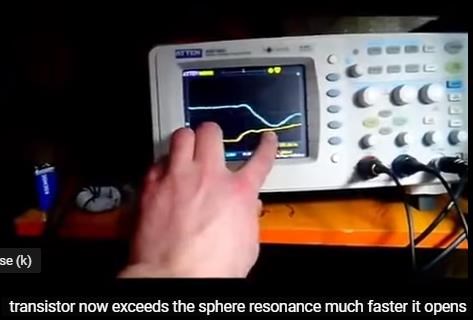
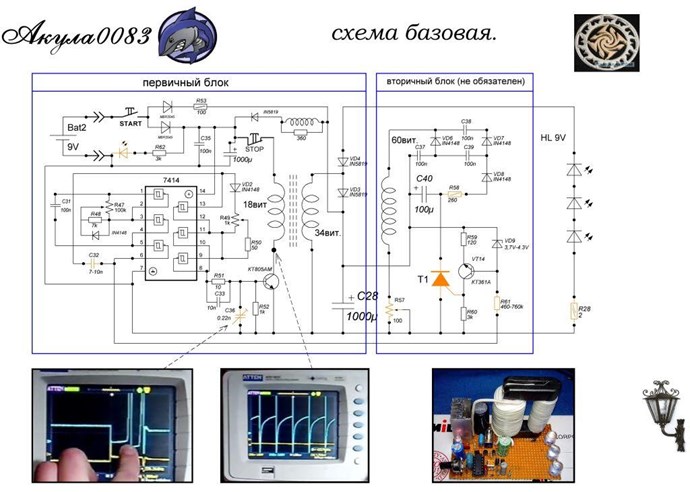
l recently decide to replicate the Akula Lantern number 4, which is shown in this video shown below:

The first experiment:

The schematic diagram that I used to create my PCB is shown below:

In the original diagram some of the component is not labeled, in order to make my PCB I need to add label to some of the component.

Below is the PCB that I made:

Initially I solder every component exact as shown in the schematic diagram, and try to make it run, but it did not work correctly[LED did light up, but did not self run]. The 7141 inverter [labeled as U1 on the PCB] as signal generator, I found it is very sensitive to the value of C31 capacitor, and 100nF as shown in the circuit diagram is not going to make it generate a steady signal. I use a function generator to control the MOSFET or BJT instead, I will switch back to the on board signal generator when I make it working. I use the signal generator to control the BJT and go through may different frequency but did not self run.

After watching the video called "Our Flashlight" from Aboveunity and hyiq Research Channel, and after reading the two thread:

 https://www.aboveunity.com/thread/akula-s-30-w-lantern-chris-s-replication/

https://www.aboveunity.com/thread/yoelmicro-s-ferro-magnetic-resonance/

I thought I need to go basic and to do some more experiment on ferroresonance.

The second experiment:

I created a circuit according to the schematic shown below:

Some detail is that, I did not use the IXDN619PI and it's related component as my signal generator, I use function generator instead, I did not use the IXFH220N06T3 MOSFET, I use IRF3205 instead. I use PC40 as the ferrite core material instead of 3C90. I did use EFD25 core and bobbin. I wrap 19 turn of 0.8mm diameter magnetic wire around the bobbin, and doing some experiment. Below is some of the result:

The ferroresonance start at 6kHz, with a duty cycle of 15%.

I latter use the same ferrite core as I used in the first experiment, and wrap around a multi strain soft wire of 0.5mm^2, with a turn ratio of 189, and use the same experimental setup as above, and I found it generate the same kind of waveform as above at 16kHz with a duty cycle of 25%, by just using the 18 turn primary, I think it should be at the ferroresonance. At the point of ferroresonance I use to connect some LED to the secondary, I found the more LED I connect the less current draw from the DC power supply, with some limit of how may LED you can connect, but the more LED you connect the less bright it became. The IRF2305 MOSFET datasheet said it have a rise time of 101ns, which is not at 20ns to 27ns range, maybe I should change to another faster switch MOSFET? I did get some good wave so I continued the experiment.  [I forgot to take photo for this setup]. 

The second experiment on ferroresonance encourage me to go back to the first experiment to do some simple setup and see if I can make it into self run. [Note: Akula Latern number 4 seems using a different energy recovery process as shown by Our Flashlight video, the Akula circuit schematic shows the secondary have a 1000uF electrolyte capacitor, and it's positive terminal connect via diodes to another 1000uF electrolyte capacitor at the primary, I think the secondary charged up the cap, and send energy to another cap. In Our Flashlight video, the secondary is not connected to the primary and I think it use another energy recovery process not shown to us than the secondary coil feedback process use by Akula].

The third experiment:

Below is the circuit schematic of my simple setup:

In the schematic diagram above I high light the component that I still use in the red circle, and I add the 4.7uF 400V cap from the second experiment. and I hope this could setup the ferroresonacne condition, and recover energy from the secondary to the cap that power the primary. I use a adjustable resistor to change the rise time, and use the function generator to control the gate.

Below is the circuit setup:

Below is the oscillscope image when the function generator is at 16kHz 25% duty cycle, the exact ferroresonance condition that I found during the second experiment.

The yellow trace is signal from the drain.

The blue trace is signal from the gate.

Now I do get some voltage recovery, but is not the same wave form as I saw before, and it need a lot of energy input from the DC power source, and the LED did not light up.  Thus I change the frequency and duty cycle and I got the follow scope shot.

I thought this might get recover some energy, even through it still need a lot of energy input from the DC power source, and the LED did not light up. I try to disconnect from DC power supply and it did not self run.

I then disconnect the 4.7uF 400V cap from the circuit, and below is the circuit setup:

I tried to run at the ferroresonance frequency of 16kHz and 25% duty cycle, but the wavefrom changed a lot, and LED did not light up.

The wave form is the same if the second experiment disconnect from 4.7uF 400V cap. It generate a lot of oscillation after turn of the MOSFET, that oscillation should from the magnetic hysteresis oscillation because the magnetic energy have no where to go, and just oscillate back and forth.

In order for it just stay in the first quadrant of magnetic hysteresis, I adjust both the frequency and duty cycle, and get to the frequency more than 500kHz,and duty cycle of near 50%, the LED did not light up, and did not self run below is the waveform:

Some thought on the experiment:

I think the circuit of Akula lanter number 4 on the internet is not correct, and change is needed, for example add a cap to the primary.

After the MOSFET turns off some the energy in the transformer need to go somewhere, or you can get a very fast oscillation.

Some questions:

What do you think I need to do to get the ferroresonacne in the third experiment, as I did in the secondary experiment?

What should I do to get the energy recovery?

Do you think Akula circuit and Our Flashlight video circuit have to different energy recovery process?

Do you think I did some some wrong or made a mistake in my experiment?[I am really looking forward to get some feedback!]

Most important thing of all:

Happy New Year!


MTKE

Order By: Standard | Newest | Votes
Chris posted this 31 December 2023

Hello and welcome MTKE,

In this thread: Yo's Ferro Resonance if you follow the basics, and replicate the small experiments we did, and then once you have the effects, you can build the Circuit up around the Effects required:

My Friends,

Today, I am going to replicate YoElMiCrO's circuit shared above, the same circuit Vidura and Jagau have also replicated:


Here is my simple setup:


Here is a Scope Shot, with Input Measurements:


Where:

  • Yellow is the probe on the top of the ferro-resonant cap.
  • Teal is Input Current.
  • Pink is Input Voltage.
  • Purple is the Math Calculation V x I.


Frequency is 87Hz, Duty Cycle is 7%

A Close up:


The pulse seen there is approximately 27 Volts, from a 2.7 Volt input. Whats "Generating" this big pulse? I cant help but think T = R x C, the Time Constant of the RLC Network!

I have adjusted the Duty Cycle from 7% to 10% a little and zoomed in some more:


Here, the Input Signal vs the Ferro-Resonant Cap or the Drain of the Mosfet:'


I believe with some work, and adjusting the capacitors and Inductance, we can make this effect much better and much more pronounced!

Best wishes, stay safe and well My Friends,

   Chris

Ref: My Post Here


Sir Richard Feynman said: "Little steps for little feet..." I am very fond of that approach! Those further ahead can go and do more advanced experiments, but some have to start with the early experiments first. Thats how I did it, and it leads to:


Take your time, study the effects, the slowly improve, all the data is already there, laid out.

Best Wishes

   Chris

MTKE posted this 02 January 2024

Hello Chris:

Thanks a lot for your information provided, today I did some experiment with the setup you mentioned.

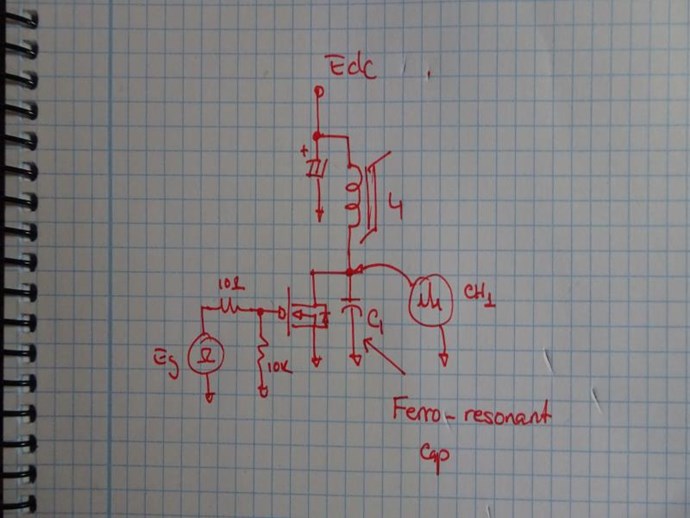
Below is my setup schematic:

For the electrolyte cap on top of the schematic, I use 3300uF/50V electrolyte cap, for the ferro-resonant cap labeled C1, I use 4.7uF nonpolar cap. For the MOSFET I use IRF3205, and 10 ohm resistor at the gate. I use 100K ohm resistor instead of 10K ohm. I use a function generator as the signal generator. I put the one oscillscope probe set at the drain of the mosfet as show in the schematic above, and another probe at the gate of the MOSFET.

FIRST LOOK

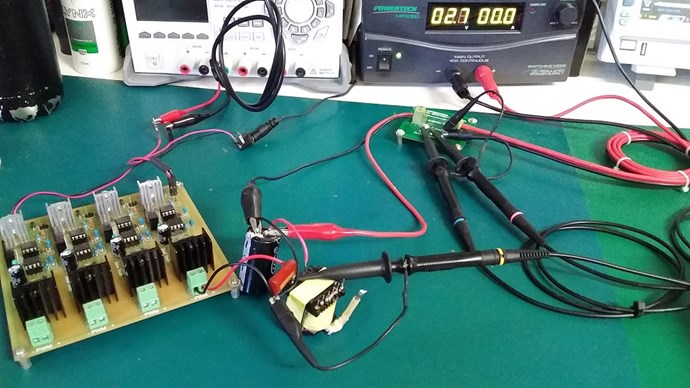
Below is my actual setup:

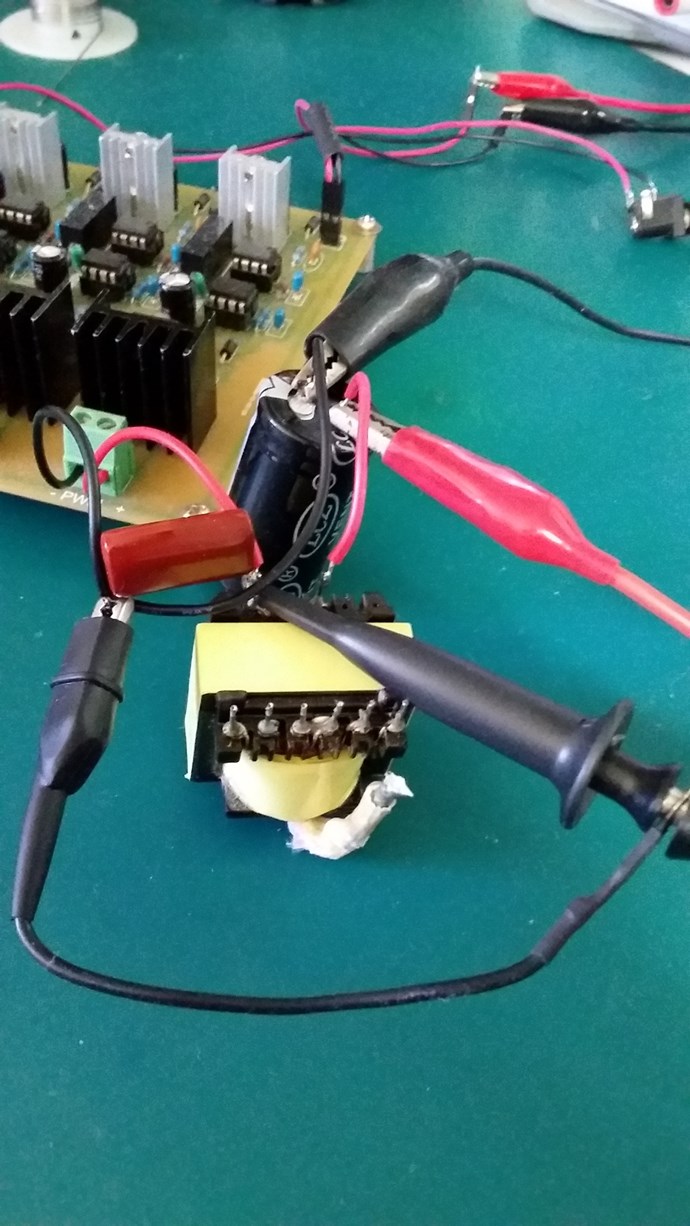
Below is the transformer that I use in the experiment [It is the same as the third experiment in the first post, with a turn ratio of 18 primary to 39 secondary] :

The function generator is set to 87Hz at 3% duty cycle, and DC power source is set to 2.7V.

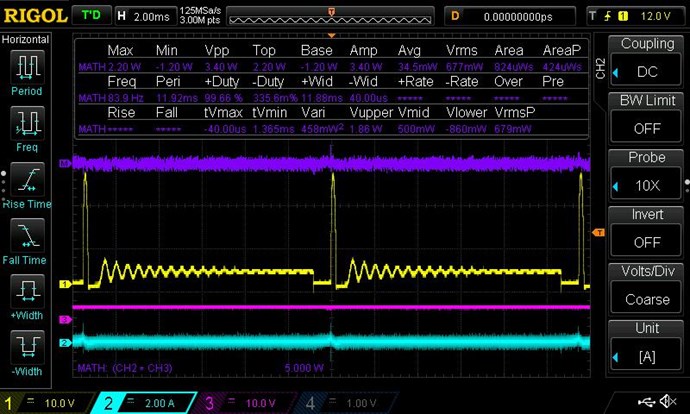
Below is the wave form:

Yellow trace is the voltage at the drain

Blue trace is the voltage at the gate

With an DC input of 2.7V, it generate a voltage of 31V, it looks very similar to the waveform we have been shown, which shown below:

In your post you mentioned that the time constant which is T = R times C, that time constant is for the RC network. I think that is the RC network of the Gate of the MOSFET, instead of the LC network formed by the inductor and capacitor.

OVERALL WAVEFORM CHANGE

Now I replaced the 10 Ohm resistor with 1K variable resistor at the gate of the MOSFET, and study the effect on the waveform:

I select 5 points of interest to study, which the resistance is at the 1K, 500, 250, 100, and 2, and look for if there is a general trend for how the system change. During the experiment the function generator will stay at 87Hz and 3% duty cycle.

Below is the experimental setup:

At 1K

At 500:

At 250:

At 100

At 2:

As you can see by changing the resistor at the gate it changed the overall waveform.

THE CHANGE OF THE WAVEFORM AT THE OPENING OF THE MOSFET

I run the test again with zoom in the waveform at the opening of the MOSFET:

At 1K:

At 500:

At 250:

At 100:

At 2:

With function generator directly connected at the Gate:

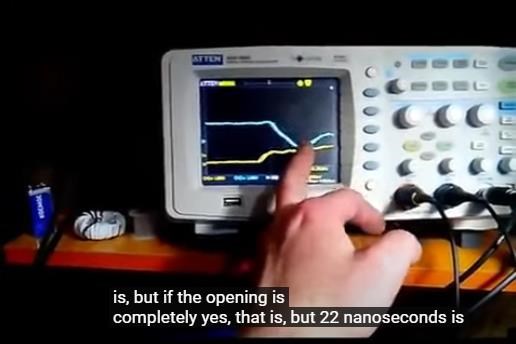
As you can see the less resistance applied to the gate the less time rise time and the faster the MOSFET opens, in this case it opens at approximately 4 microseconds, which is with in the 20 nanoseconds range that Akula talks about for the ferroresonance.

THE CHANGE OF THE WAVEFORM AT THE CLOSING OF THE MOSFET

I run the test again at with zoom in the closing of the MOSFET

At 1K:

At 500:

At 250:

At 100:

At 2:

With function generator directly connected at the gate:

As you can the resistance at the gate see it still changes the waveform at the closing, but not as much as the opening.

THE WAVEFORM WITHOUT THE 4.7uF NONPOLAR CAP C1

I did a study on if we don't use the nonpolar cap C1, what going to happen to the waveform:

Below is the experimental setup:

As you can see I removed the 4.7uF nonpolar cap.

Below is the waveform:

As you can see the voltage of the spike right after the closing of the MOSFET increase from the 31V, to 60V and it clip out by the transistor due to the drain-source voltage is excided the maximum of IRF3205 MOSFET can handle.

INTERESTING FINDING: ELECTROLYTE CAP DOESN'T DROP VOLTAGE AFTER DC POWER SOURCE HAS BEEN REMOVED

After study the effect above, I put the 4.7uF cap back to the circuit, and continue study different effect, on thing I find out is that when it as certain frequency and duty cycle, even after the DC power source has been removed the 3300uF electrolyte capacitor doesn't drop voltage despite continue pulse the MOSFET, but when I attach the LED to the secondary as the load, it either doesn't light up at all or if does light up the voltage of the cap drop slowly if LED is dim or fast if LED is bright.

Below few of the condition that this setup doesn't drop voltage if no load applied to the secondary.

At 16kHz:

At 67kHz:

CHANGE TO A FASTER SWITCHING MOSFET:

After the above study, I decide to change to a faster switching MOSFET to see the effect, because the IRF3205 MOSFET have a rise time too slow. In the datasheet it state that it has a rise time of 7ns, I will give the name of the new MOSFET in next post.

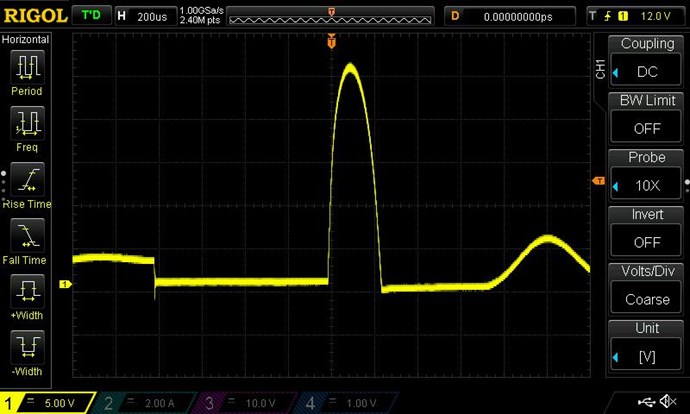
Below is the trace of the opening of the MOSFET:

As you can see it have a rise time of 75ns, very close to 20ns range as stated by Akula.

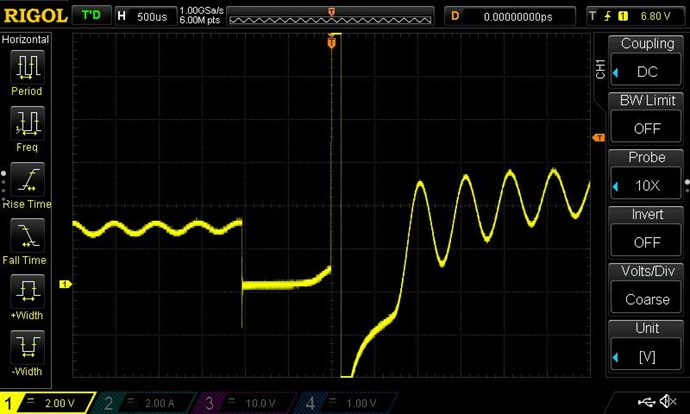
Below is the overall waveform:

I find it getting close to the waveform that is given by Akula, I then pulse it at 345Hz, and I got the flowing waveform:

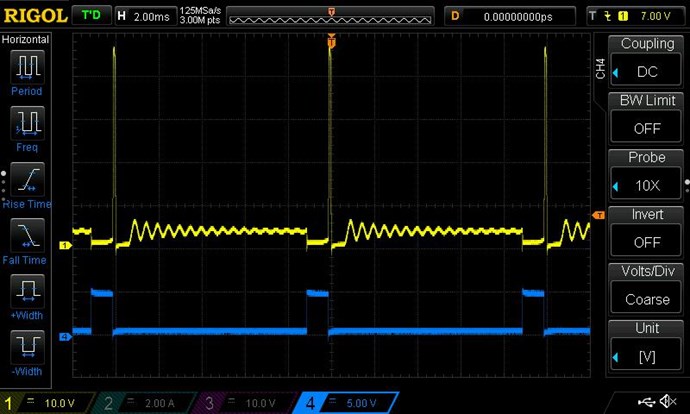
Below is the waveform given by Akula:

I then solder the new MOSFET and transformer in to the PCB board in my third experiment from my first post, and I find if I solder my secondary in to the circuit board location the LED won't light up, thus I solder the secondary directly to the LED, then the LED light up, as shown below:


I then unplug the DC power supply to see if it can self run, but the light dimmed quickly, thus I found it did not self run, but I still find it is a step forward.

THOUGHT ON THIS EXPERIMENT

First I find that this test setup is like the Bedini SSG circuit

Below is the schematic of the Bedini SSG circuit:

As you can see, in that circuit, it pulsed a transistor, connected with a inductor and a battery, in our setup it too pulsed a transistor connected with a inductor and a capacitor, the SSG circuit keep the battery charged using the inductive pulse of the inductor, in our case we seem too charge our capacitor using the inductive pulse. Maybe that is one of the reason I find the cap did not discharge after I disconnect it from the DC power supply.

My experiment also show that get the correct transistor rise time is important to get the same waveform as shown by Akula.

NEED SOME FEEDBACK

I find the electrolyte cap connected to the secondary only charged up to the power supply voltage, which should not be the case, since the turn ratio between primary and secondary is different, I have not figure out the reason.

I got the waveform that is shown by Akula and indeed the rise time to the transistor is important for this setup. But the system did not self run, it can't keep the capacitor stay its voltage after disconnect from the DC power supply, what is the reason, it that because I applied to much load or because some other reason of the circuit.

I am excited to see your feedback and advice on how do I need to continue working toward the replication and eventually made it work as expected.

THANKS A LOT!

MTKE

Chris posted this 02 January 2024

Hey MTKE,

Very nice work my friend!

The Mosfet Gate Control is the next thing to work on, this time needs to be between 20 and 27ns.

I did a post on this:

My Friends,

Trust is something that must be earned, its easily tested, and many have shown how Un-Trust Worthy they really are!

A Self Running Machine was posted to a thread previously, and the thread was deleted. Deleted by the Thread Owner. I had given some constructive criticism, on the way the thread was handled. I posted the Secret that the Thread Owner was trying to avoid. Trying to claim as their own amazing discovery.


The thread was posted some time ago, November last year, and I posted an argument, showing that the discovery that was claimed was already known:


Oh My, what some people get up to:


So you see the secret, how it can lay right in front of your eyes and not notice it?

I replicated and also showed the secret:


This took me all of about three minutes to throw together.

Here is a simple analogy:


Best Wishes,

   Chris

Ref: My Post here


There is one or two posts after that post that may also interest you, because the effect is greatly increased if one gets the Mosfet Gate Rise and Decay time around the 20ns to 27ns. This is important and this ex-member tried to mislead others on this very simple fact.

Good luck, you have already come a long way!

Best Wishes,

   Chris

MTKE posted this 03 January 2024

Hello Chris:

Thanks a lot for the information, I did go through the posts that you mentioned, and its is very useful to the replication.

Regarding to the Rise and Decay time, I did some experiment today. I will first give some information on the MOSFET and other things that I am currently using in today's experiment, and some information that I forget to give during last few posts. [Like I said before I hope to leave a good information for the newcomer to this tech like me, who might facing the same problem as I do, they can find some answers in this thread, thus I will do it as transparent and as detail as possible, thus all the mistake that I made and problem that I come across can be avoided by the newcomers who is flowing this thread. I think I can eventually make it to self run as expected. But how long does it take for me to make everything correct? I don't know, I hope not too long.😄]

SOME INFORMATION REGARDING THE MATERIAL AND EQUIPMENT THAT I USE

Regarding to the equipment list:

Oscilliscope, Function Generator, DC power supply, a soldering iron and a desoldering pump.

Regarding to the equipment model:

The model for Oscilliscope and Function Generator, it's already in the picture of last few posts.

The DC power supply is GWINSTEK GPS-4303C, it has four output channels and a ground channel. [I just use one channel for now, thus I think any decent adjustable laboratory DC power supply will work. ]

For the soldering iron, and desoldering equipment I any decent table top soldering iron and desoldering equipment will work.

Regarding to the material:

The ferrite core that I use, is UYF12 is the shape of the ferrite, and 3670 is the dimension number. The core material is PC40.[I have show that in my second post.]

The wire around the ferrite core is a copper wire called RV0.5, with an outer diameter of 2mm and inner conductor area of 0.5mm^2.

Below is the dimension and parameter for the core:

Regarding to the transistor that I currently use:

The fast switching transistor is AP20N06T.

Below is the attachment for the AP20N06T transistor datasheet:

AP20N06T 

With all that been said, I going to talk about the little experiment that I did today, regarding decreasing the MOSFET opening time.

HOW TO DECREASE MOSFET OPENING TIME

Basically the gate of the MOSFET have an electrical insolation layer to to the doped silicon substrate below. When N channel MOSFET is opening the positive voltage will attract the electron from the p type doped substrate and form an layer of electrons from the drain to the source, the layer in the substrate and the gate formed a little capacitor, and capacitor need to take time to charge it up. The larger the charging current or the smaller the capacitance the faster it going to turn on. It can depend on other factors like the doping level, but that is controlled by the manufacture.

EXPERIMENTIAL SETUP

In today's experiment I turn down the output impendence of the function generator to 3 ohm, and connect directly to the gate of the MOSFET.

Below is the function generator setup:

I use the PCB from the pervious experiment:

MEASUREMENT

First I measured the MOSFET opening time as shown below:

Yellow trace is the drain voltage

Blue trance is the gate voltage

At he beginning of open up, there is a little increase in voltage, I think we also see it little bit in Akula's video. But Akula did not count it, so I don't count it here, then it take about 20 nanoseconds for it to settle down, so the opening time is about 20 nanoseconds.

I then look at the closing of the transistor as shown below:

It took about 60 nanosecond for the drain votlage begin to rise to reach stable point.

Overall waveform looks like below:

THOUGHT ON THE EXPERIMENT

The MOSFET now have a faster switching time than pervious experiment, it now can have a opening time of 20 nanosecond and closing time of 60 nanoseconds.

I try to disconnect the DC power supply to see if can self run, it did not self run. The transformer under low frequency is making a lot of noise, and in order for the LED to light up, I need to increase my duty cycle, but that lead to a higher power consumption.

It did not self run is due to core have a large magnetic loss or there are some other component need to be added or changed in order for it to work correctly?

NEED ADVICE

I would like to have some advice regarding the replication process.

THANKS A LOT!


MTKE

Chris posted this 03 January 2024

Hello MTKE,

Now, all you need to do is make sure your secondary coil has 2.5 times or more turns as the primary.

Of course, we all know, some fiddling is required, like Akula showed, mostly on the gate time.

Best Wishes,

   Chris

MTKE posted this 05 January 2024

Hello:

Today I thought about the coil that I had is very noisy at low frequency, I think this is due to the core is been glued together by tape, and there possible a small gap in between, thus I wound a new transformer with a annular ferrite core. The turn ratio is 18 primary to 62 secondary.

Image of the new transformer:

INITIAL TESTING

I then test it without any load to see the waveform, using the 345Hz and 3% duty cycle setup I used before, the waveform at the drain is shown below:

I think the waveform looks good and the opening of the MOSFET is 20 nanosecond. The nose at low frequency is largely gone at this transformer, I think is due to it doesn't a that small gap. I then begin test it under load.

TESTING UNDER LOAD

I then solder the transformer onto my PCB board, below is the image:

I connect the transformer directly to an LED, the LED did light up.

Below is the waveform at the drain is shown below:

The waveform with out the load is different from the waveform under the load, there is a difference here.

I then disconnect the DC power supply and the LED gradually dimmed.

I then try to change the frequency and the variable resistor at the gate, and the duty cycle and the input voltage, each at a time, and unplug the DC power source, to see if this setup can self run, but it did not. Under low duty cycle like 0.5% or less, the LED does light up longer but it dimmer, and the capacitor voltage still drop at a low speed. I I change the frequency or duty cycle, the voltage on the capacitor will rise for a moment and then start to drop again.

SOME THOUGHT ON THE EXPERIMENT

The transformer certainly have a lower magnetic leakage, than the pervious transformer. But I don't know why it can not keep the capacitor charged. 

NEED SOME ADIVCE

Maybe there are more things to how to build the transformer in a way that the secondary under load will not have much effect on the primary? Maybe there are more circuit need to build to recover the energy and feedback to the capacitor? Some advice will help this replication process.

THANKS A LOT


MTKE

Chris posted this 05 January 2024

Hello MTKE,

As time goes on, and attention to detail improves, you will reach this:


So, don't give up! Study what Akula, and my pages has given you, pay attention to Coil arrangements and the rest will fall into place.

Best wishes,

   Chris

MTKE posted this 06 January 2024

Hello Chris:

Don't worry, I am doing great!

You see, the process of achieving the goal is more important than achieved the goal. In the experimenting process, we all can learn from it. Just got what we want immediately, we can not learn things. If I just write how I make the stuff works the first time, then we can't not learn anything from it. Success comes from the difficulty we face during the learning process. Only with the learning process we can truly gains a deeper understanding and insight of how the device works, and with that understanding and insight we can makes it works better than ever before.

I want my replication process be a learning process, and let the newcomers in the future, can have the same learning process the same as I do, thus we all can gain a deeper understanding. That is more important than just tell newcomers how to construct a working device.

I need to move my Lab in next few days, and I am very busy recently. I will keep experimenting as soon as I have time and give more on details on my experiment. I will also post some of my understanding on how the device works.

I will also post some of the good document on over unity device that is not discussed in the community, and that will open up a whole new thread.


Thanks a lot

MTKE

MTKE posted this 10 January 2024

Hello:

Today I moved my lab to a new location, and continue the experiment. I give some thought about the experiment, I thought the most issue about the replication is about how to make the cap to continue recharge itself after disconnection from the DC power source. I thought that the impulse from the MOSFET closing could be respond to the charging of the capacitor. The impulse is a high voltage impulse, thus from the Akula video he suggest use some high voltage cap, thus I got some 100uF 400V electrolyte cap. The drain and source of the MOSFET should also need to handle high voltage for the charging the cap. If not, the high voltage will force open the MOSFET and leak energy to the negative terminal of the cap. I then change the cap to a MOSFET can with stand of 650V fast swithing MOSFET. Below is the datasheet:

ASA60R090EFDA 

I then setup the experiment:

EXPERIMENTIAL SETUP

It is very simple just the cap and inductor pulse setup I used before.

The input is setup as before:

I continue use the same transformer that I used last time:

The input is 9V as shown below:

The input at no load have a very small current.

WAVEFORM

This is the overall lock at the waveform:

The MOSFET opening:

As you can see the opening is about 150 nanoseconds

The MOSFET closing:

The closing is about 6 microseconds. As you can see it generate a pulse about 120V. I disconnect the DC input, the voltage drops slowly.

Now I closed the secondary without any load to see the effect on the waveform:

The waveform now change into below:

All the ripple of the waveform become much smaller than before, it look a lot like the waveform used to get as before.

I look at the opening of the MOSFET again, and it looks like below:

Now the DC input is shown below:

There is a current of 0.6A to the input.

I disconnect the DC input the voltage drops quickly.

SOME THOUGHTS

The experiment shows, that the high drain to source voltage of the MOSFET can cause the voltage oscillation at the closing, I think this is due to the energy from the coil have on where to go, and cause the voltage to drop slowly. If it is connect to a load, then the voltage will drop quickly, due to the energy from the cap has been used up. It can also show that even the voltage of the cap is high and it still can't take the energy from the coil. Maybe some other method is needed to get the energy from transformer at the closing of the MOSFET to the cap? If this method is good, do I need to check the current at the closing of the MOSFET to see where is goes? Or there is something to do with the transformer, for example the wire length has to be quarter wavelength?

Any feedback is good.


Thanks a lot

MTKE

We're Light Years Ahead!
Members Online:
What is a Scalar:

In physics, scalars are physical quantities that are unaffected by changes to a vector space basis. Scalars are often accompanied by units of measurement, as in "10 cm". Examples of scalar quantities are mass, distance, charge, volume, time, speed, and the magnitude of physical vectors in general.

You need to forget the Non-Sense that some spout with out knowing the actual Definition of the word Scalar! Some people talk absolute Bull Sh*t!

The pressure P in the formula P = pgh, pgh is a scalar that tells you the amount of this squashing force per unit area in a fluid.

A Scalar, having both direction and magnitude, can be anything! The Magnetic Field, a Charge moving, yet some Numb Nuts think it means Magic Science!

Message from God:

Hello my children. This is Yahweh, the one true Lord. You have found creation's secret. Now share it peacefully with the world.

Ref: Message from God written inside the Human Genome

God be in my head, and in my thinking.

God be in my eyes, and in my looking.

God be in my mouth, and in my speaking.

Oh, God be in my heart, and in my understanding.

Your Support:

More than anything else, your contributions to this forum are most important! We are trying to actively get all visitors involved, but we do only have a few main contributors, which are very much appreciated! If you would like to see more pages with more detailed experiments and answers, perhaps a contribution of another type maybe possible:

PayPal De-Platformed me!

They REFUSE to tell me why!

We now use Wise!

Donate
Use E-Mail: Chris at aboveunity.com

The content I am sharing is not only unique, but is changing the world as we know it! Please Support Us!

Thank You So Much!

Weeks High Earners:
The great Nikola Tesla:

Ere many generations pass, our machinery will be driven by a power obtainable at any point of the universe. This idea is not novel. Men have been led to it long ago by instinct or reason. It has been expressed in many ways, and in many places, in the history of old and new. We find it in the delightful myth of Antheus, who drives power from the earth; we find it among the subtle speculations of one of your splendid mathematicians, and in many hints and statements of thinkers of the present time. Throughout space there is energy. Is this energy static or kinetic? If static, our hopes are in vain; if kinetic - and this we know it is for certain - then it is a mere question of time when men will succeed in attaching their machinery to the very wheelwork of nature.

Experiments With Alternate Currents Of High Potential And High Frequency (February 1892).

Close