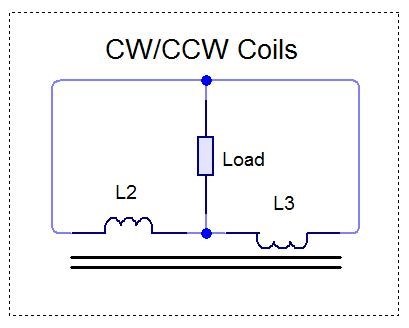
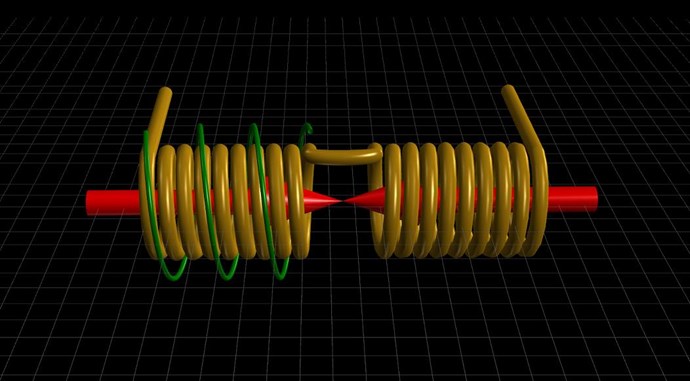
L3 Opposes L2 and L2 Opposes L1 thus L3 Assists L1, lowering the Input Current Required, focus on this and Understand this simplicity, then look towards Scale.
Thank you Chris for keeping the focus clear.
I would like to make a summary and survey of all the parameters and factors involved in optimisation (so far as I have understood) so that a suitable strategy can emerge for the steps ahead. Key point are followed by my thoughts and comments.
Objectives
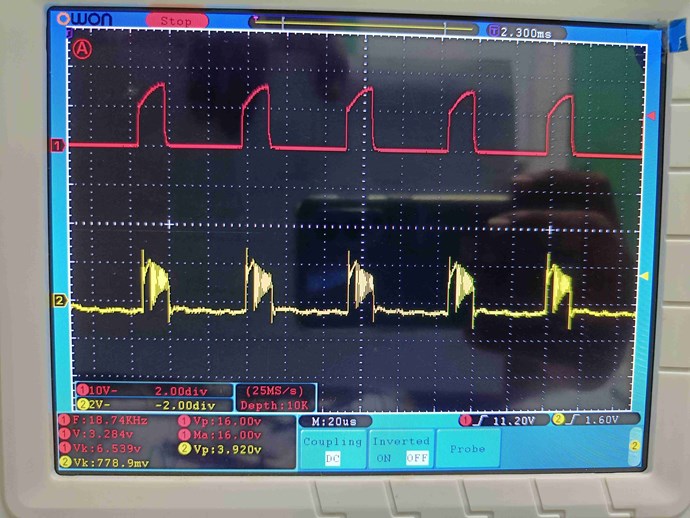
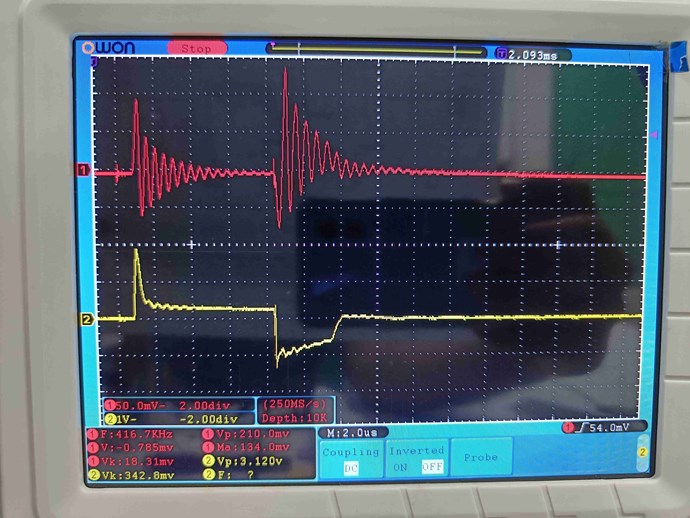
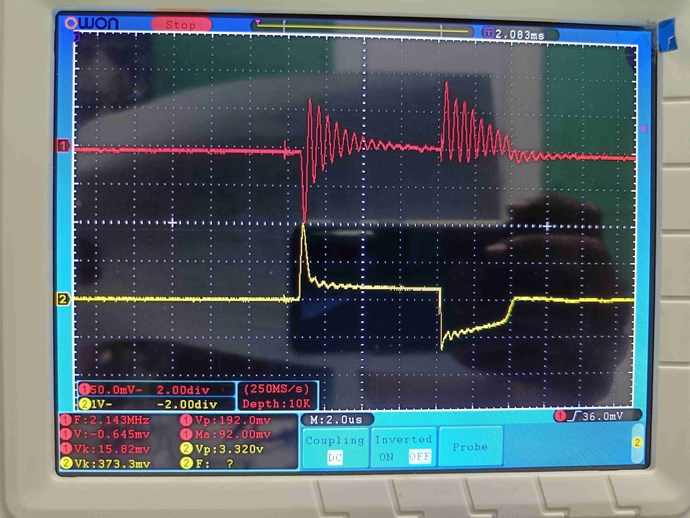
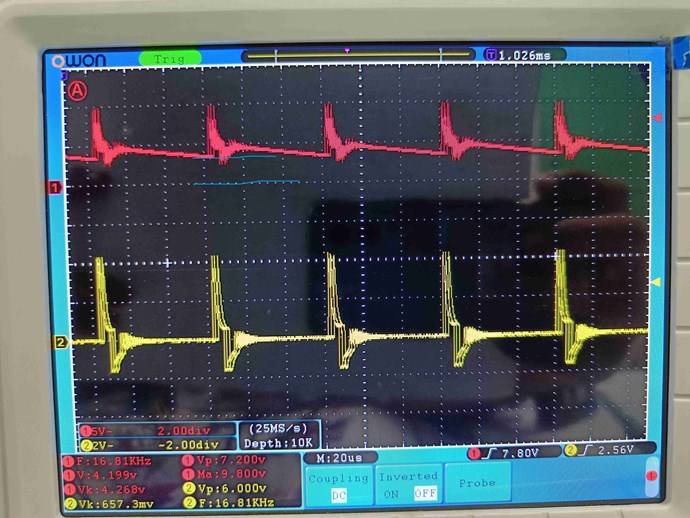
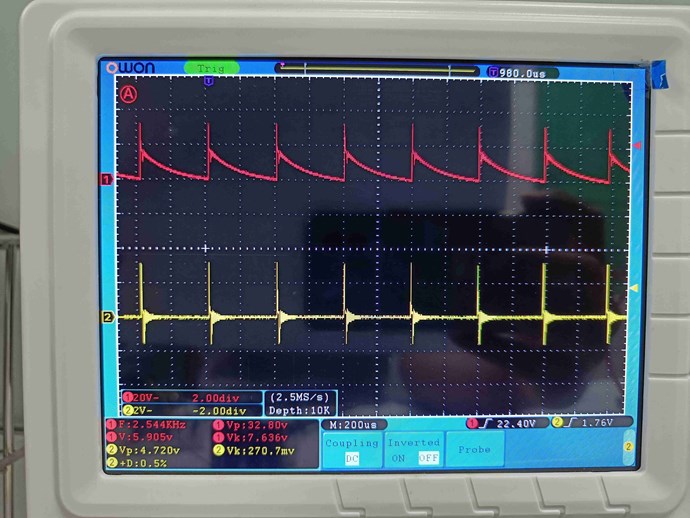
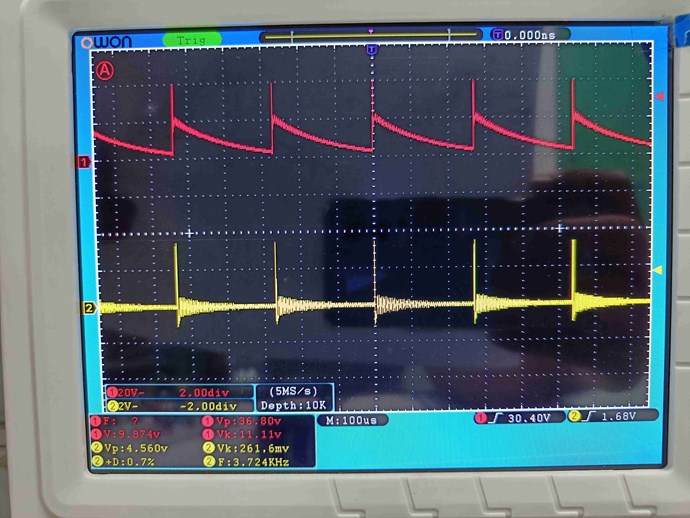
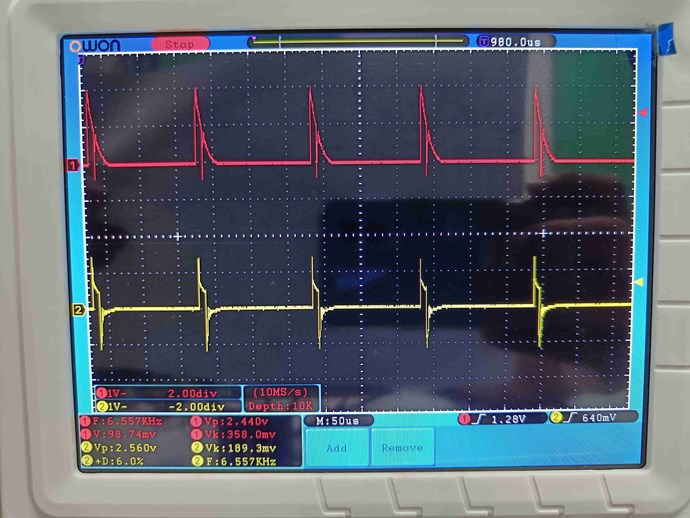
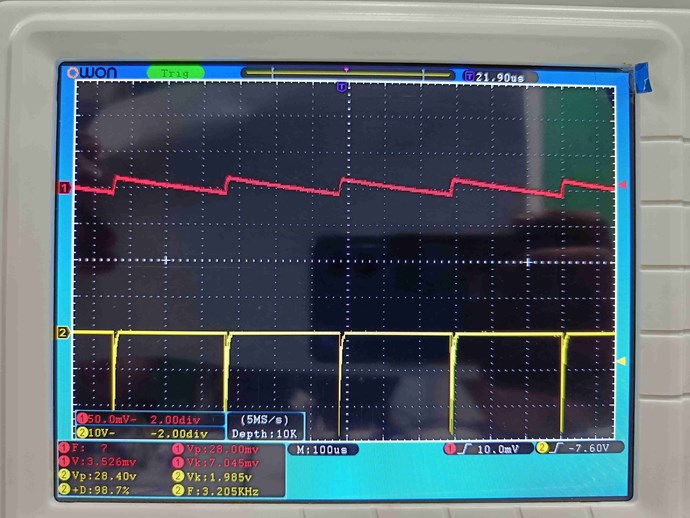
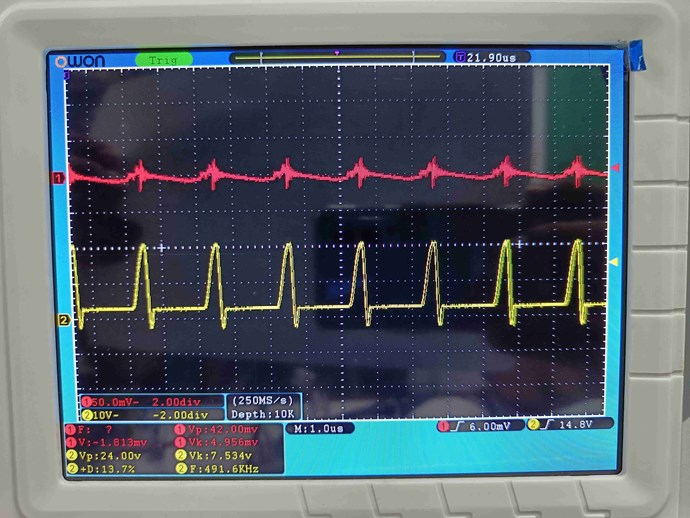
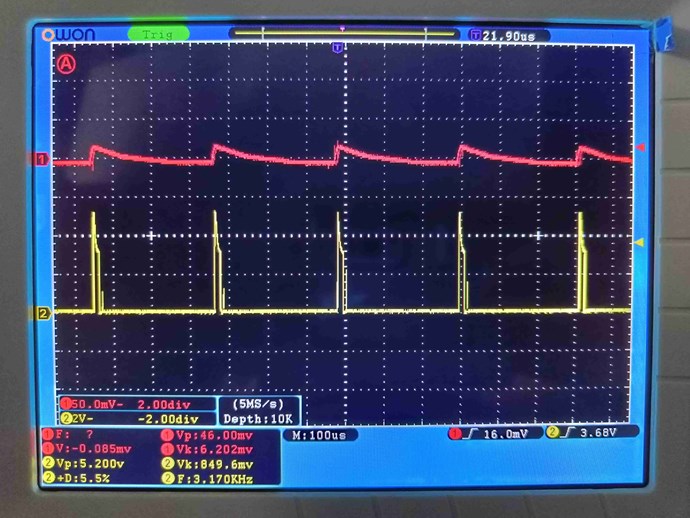
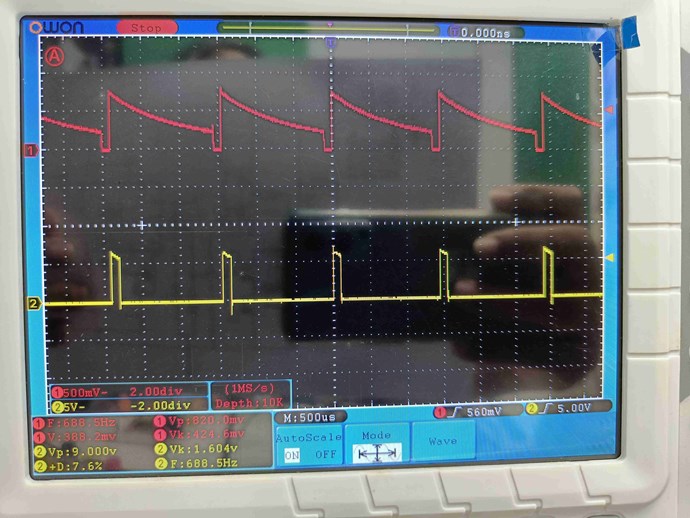
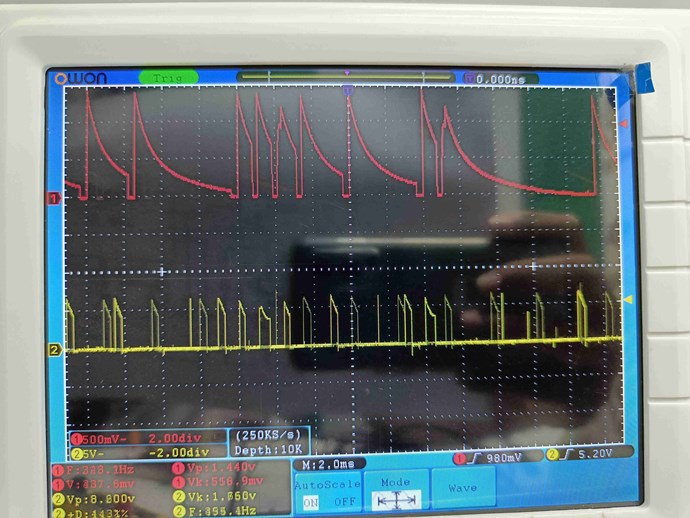
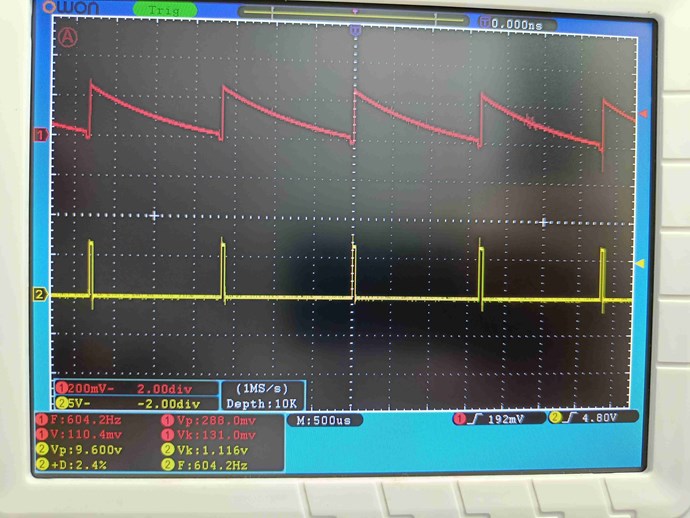
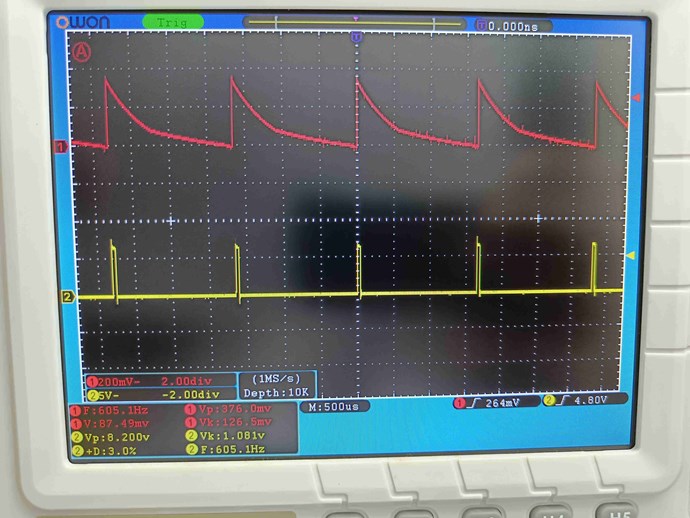
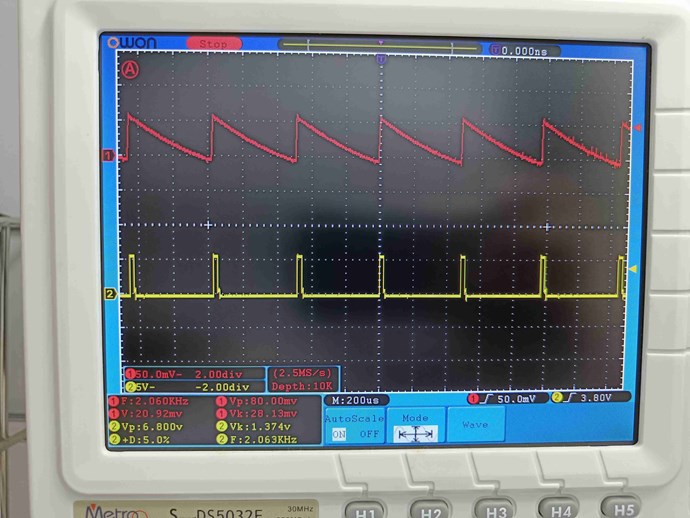
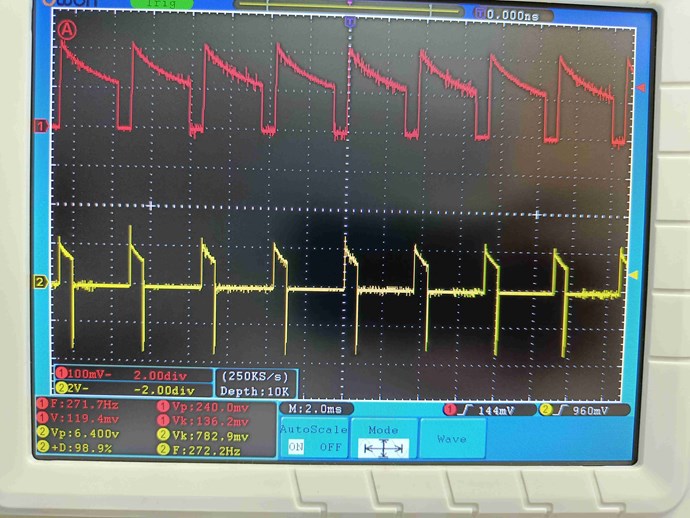
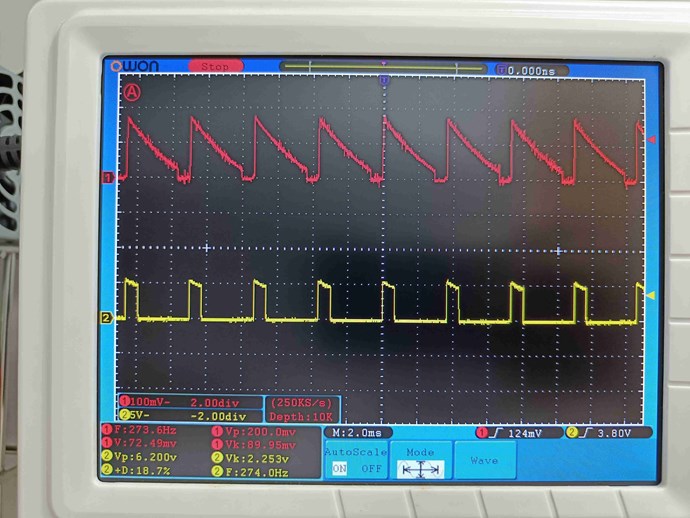
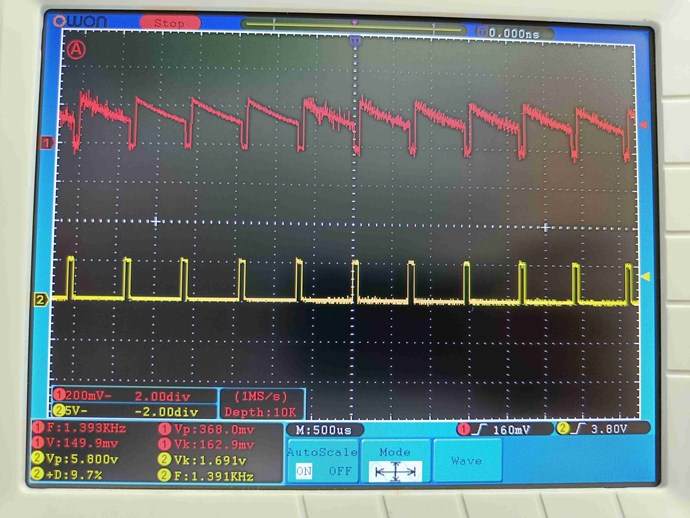
Two aspects to our focus: A) Get the magnetic fields to slap together with increasing intensity and precision of timing, B) watch for the lowering of input current as reference for improvement of A, and relative increase of sawtooth wave duration in proportion to duration of input pulse.
Parameters to optimise
Increasing of magnetic strength and correct timing requires the following placed as numbered points.
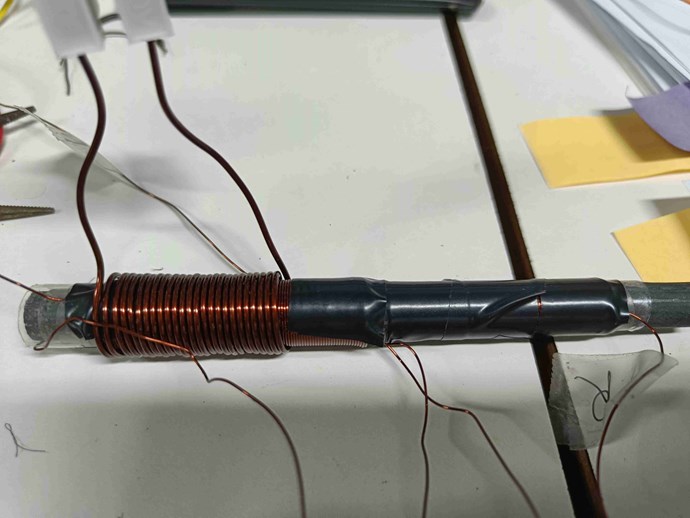
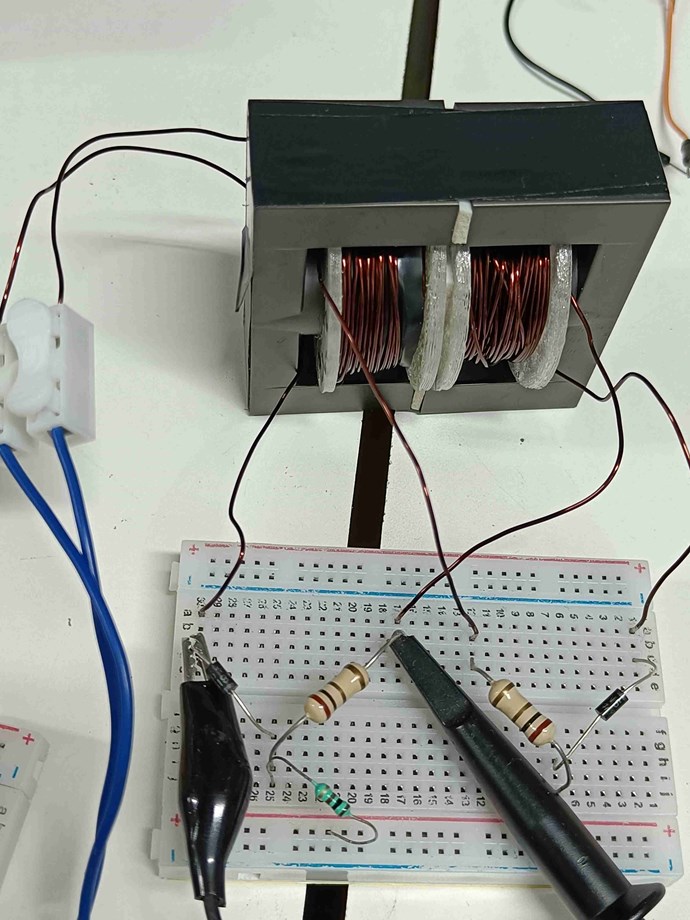
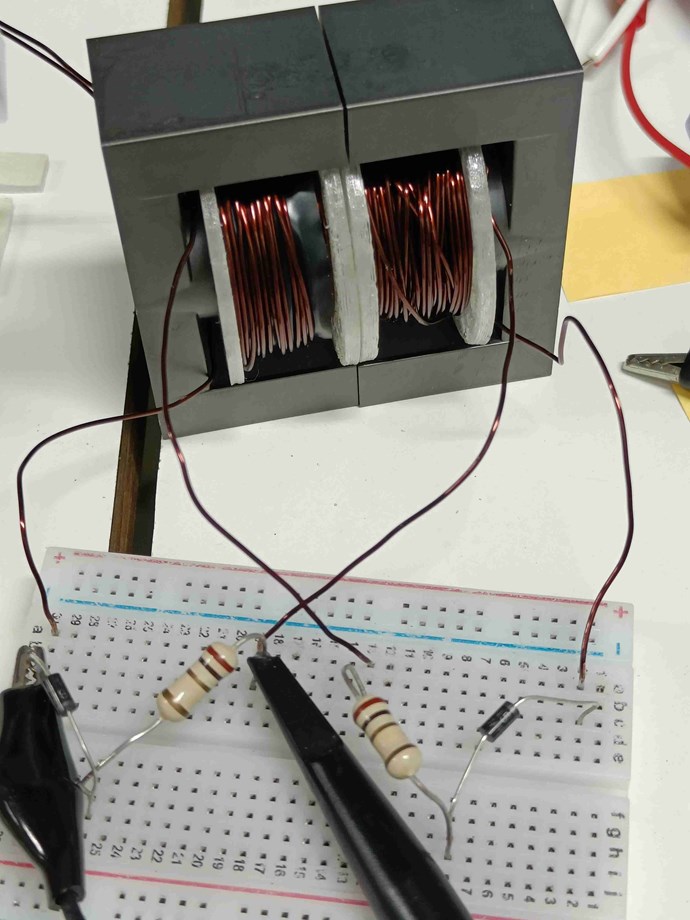
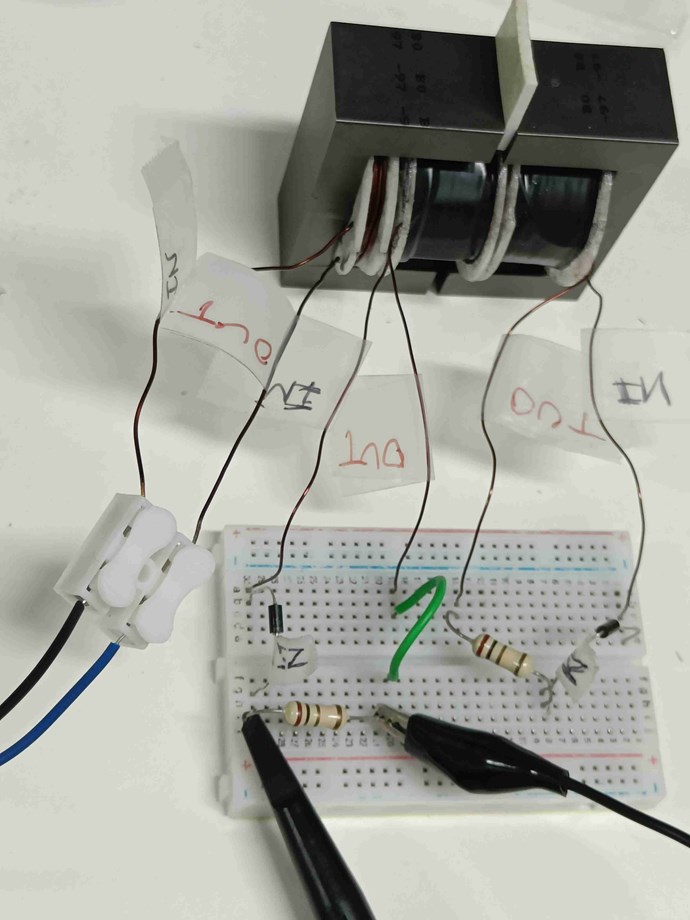
Coil geometry
1. increasing number of turns. This may require reducing wire diameter, but not so much as to limit current.
2. reducing length of coil (more turns per length). At the limit this means length of a single wire diameter with all turns one over the others, i.e. a pancake coil. But this will increase average radius too far from the core and so reduce field strength. A good compromise might be to make length equal or slightly more than the average distance of the layers from core.
3. increase cross sectional area (CSA) of magnetic flux and hence the inductor core. This makes the inductor core expensive and also increases wire length and hence resistance. Generally speaking with larger cores, the wire diameter also needs to get larger, keeping overall number of turns nearly same as for a smaller core, but yielding higher overall gains in current and power. Or wire length can be proportionally reduced with increased CSA to get the same field strength as a small core.
4. reduce core gap. Core gap is needed to boost fields strength, but reduced gap makes fields stronger.
The best practices recommended by Chris in coil geometry is:
The ideal, but not always practical rule should be, minimal Turns N of Maximum Wire Gauge AWG on the shortest possible Spool Length, giving a Short Coil Length l.
So a Large Cross Sectional Area CSA with a Short Coil Length l, and Large Wire Gauge AWG, will give best results for the Output!
Pulse generation
5. increase voltage of input pulse. This can increase field by square of voltage, so dangerous to go too high. But too low a value may not get enough field strength to produce useful effect (using up current to just magnetise the core and leaving nothing to induce in L2/L3), or may make the pulse edges not sharp enough as the driving circuit also needs minimum current for best edges. For now, will limit experiments to between 6v to 12v. Larger cores will need higher current to build the magnetic field before beginning to influence L2/L3.
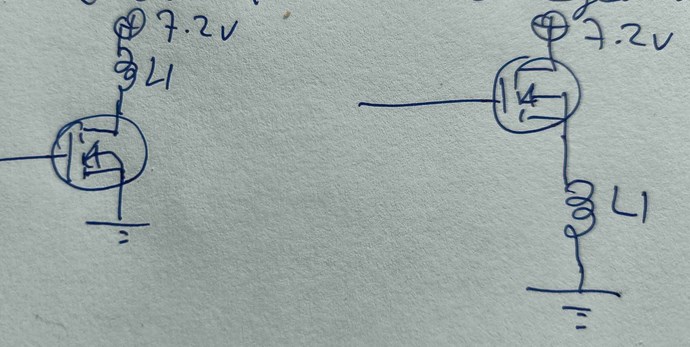
6. increase the rate of increase of input pulse both in rise and fall. This requires good pulse circuits, use of MOSFETs, reduced resistance and reactance in input coil. So thicker and shorter input coil wire is better. Also, the closer L1 is wound to L2 the better in transfer of pulse without distortion.
7. faster circuit components. Use MOSFETs and diodes rated for high frequency, even on L2/L3 side of circuit which need to respond as fast as L1.
Timing / Magnetic resonance
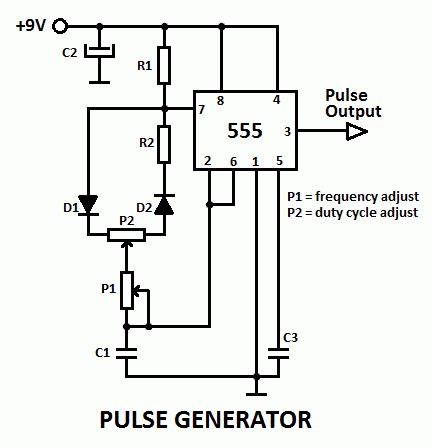
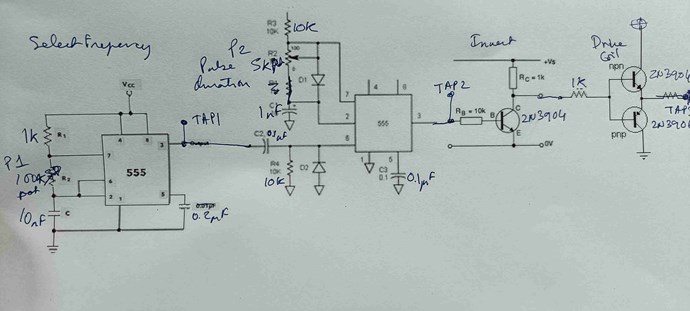
8. precise frequency of input pulse. The pulsing circuit needs to have precise and stable control of input frequency (F). One large variable resistor to sweep through a range, and another smaller one in series to fine-tune.
9. precise pulse-width or duty-cycle of input pulse. Although this can be seen as precise control of duty cycle (D), in actual fact I think it is the pulse width (W) which is more important (as discussed below). A circuit that offer separate control of F and D will be inconvenient as each change in F would require re-tuning D to keep pulse width the same. I believe the best kind of pulsing circuit will be one that offers separate controls for F and W, so that after fixing optimum pulse-width W one can freely adjust frequency F separately. See discussion below.
10. non-linear inductance, coil shorting, etc. These are advanced optimisations using MOSFETS inside L3 circuit, and other methods to get much higher results, which I list here for sake of completeness. But premature for my present stage of experimentation. Chris has several threads referring to these techniques.
Some thoughts on timing
My thinking on this is as below. Please treat this as logical but speculative until experiments confirm. I would request those who have already succeeded to advise or correct as they see fit.
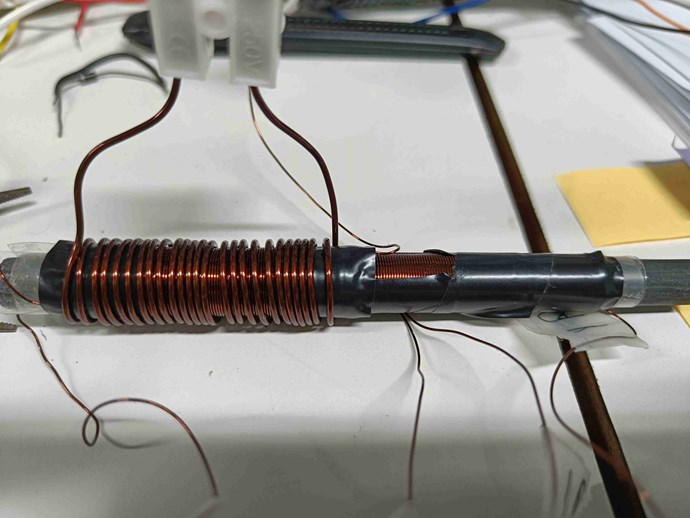
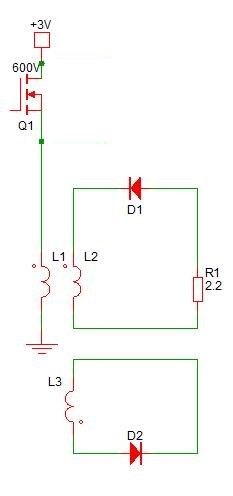
Assuming no diodes, and L1, L2, L3 on a common core in this sequence, the rising pulse on L1 induces opposing voltage in L2 but also in L3 but with delay as it is farther. The increasing field in L2 generates opposing voltage in L1 and L3 at the same time, and the increasing field in L3 generates opposing voltage in L2 and with a delay in L1. While there is asymmetry, it is largely dependent on distance between coils and strength/weakness of influences.
Similarly the falling L1 pulse also induces the opposing voltage in L2 and L3, which then influence each other and L1 with delay between L3 and L1. These would be opposite of what the rising pulse induces.
Inserting the diodes changes this and forces a strong asymmetry. All inductions in L2 and L3 only create current when in alignment to the diodes. Within L2, only the inductions of one direction build, and within L3 only inductions in the other direction build (assuming correct diode directions). The overall result is that L3 assists L1 and lowers input current requirement, leading to the full POC effect. [I want to acknowledge with due credit a private PM from user Raivope in which he originally highlighted this role of the diodes.]
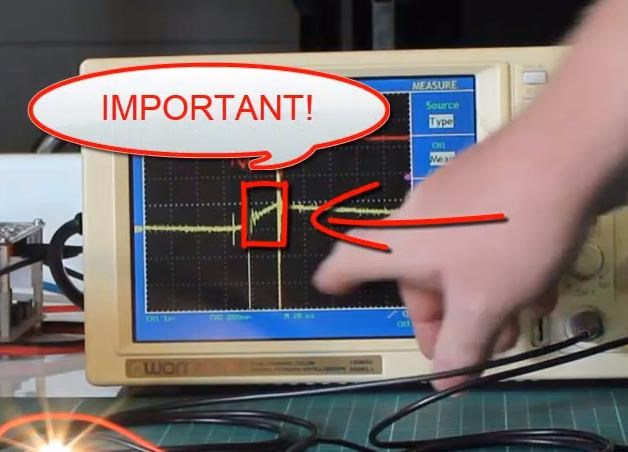
Since the rising and falling edges produce opposite currents in L2 and L3, in practice one edge induces L2 and the other edge induces L3. This can easily be validated if you have a difference in sharpness of rising and falling edges. You will then get better results with both diodes in one direction than both flipped in the other.
Assuming the rising edge induces in L3 and the falling edge induces in L2, the delay between the two should be a factor in attaining magnetic resonance and power generation. If our load is on L2, then L3 rising before L2 or falling after L2 will reduce overall power in L2 by opposing it. Ideally L3 should rise with L2 (or just after) and fall with L2 (or just before). If L3 is farther from L1, then the time taken for L1 pulse to reach L3 is longer thus allowing L2 more time to be induced by the falling edge, thus reducing the time lag between L2 and L3 inductions and giving better sync in POC effect. The opposite would happen if L2 was induced on the rising edge and L3 on falling edge -- the gap between the two magnetic fields buildup would grow much more. Ideally therefore both diodes should be aligned so that L3 triggers on rising edge and L2 on falling edge.
Here the importance of the pulse width becomes obvious as it should ideally be exactly the time taken for the magnetic pulse to travel the distance from L2 to L3 giving perfect timing for both magnetic waves to be induced together and to collide in sync. A slight separation between L2 and L3 also aids this timing (suggested by Chris). A slight difference in turns between L2 and L3 (also suggested by Chris) helps to ensure L3 falls before L2. [Chris's suggestions are here: https://aboveunity.com/thread/how-to-build-your-own-above-unity-machine/. I must clarify that the logical speculations here are mine and need not represent Chris' views. I only refer to his suggestions (which were posted in that thread without explanation) as the logic presented here justifies and explains the value of his suggestions.]
In case of other geometries of coil placement on different legs of E-cores or different locations on C-cores, the above logic and line of thinking will apply, although conclusions for timing optimisation may differ slightly. I believe this line of thinking can greatly improve overall design of coil layouts and of timing strategies. Perhaps this is already known to the advanced users here. But since I did not find this anywhere so far (and I've not yet read everything!) I offer this as hopefully useful for all.
Hence my thinking that control of pulse width is more critical than control of duty cycle.
That's all for now.
Please feel free to correct or add to anything above. My hope is that we can compile a comprehensive list of parametres relevant to optimisation.
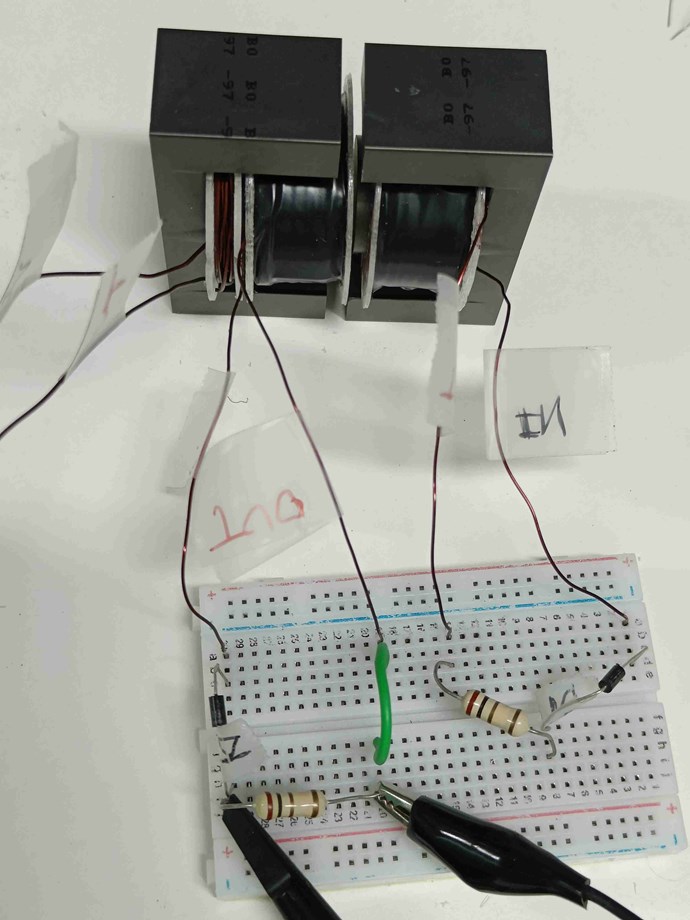
Here ends the speculation and theory. I will hereafter focus on results and continue to share experimental results as I go along.
This has been long post. Hopefully it will help to trigger discussion and lead to better optimisation.